Deprecated: Creation of dynamic property Storely_Customizer_Notify::$config is deprecated in /home/w4405701/public_html/wp-content/themes/storely/inc/customizer/customizer-notify.php on line 36
SellerCart, Author at Sellercart
VersaBlog: Exploring Health, Fitness, Finance, and More
Streets to Global Sensation: Chicken Tandoori Momos

Indulge in the delightful world of Chicken Tandoori Momos, a fusion dish that tantalizes your taste buds with a burst of Indian spices and juicy chicken. Learn about the origin, preparation, nutritional value, troubleshooting tips, and popular variations of this mouthwatering delicacy.

Introduction

Welcome to the flavorful journey of Chicken Tandoori Momos, a perfect blend of Indian spices and dumplings. This article will explore the origins, preparation methods, nutritional benefits, troubleshooting tips, and the diverse range of Chicken Tandoori Momos. Get ready to dive into the world of this delectable fusion dish that has won the hearts of food enthusiasts globally.

An appetizing display of Tandoori Momos, arranged elegantly on a plate, ready to indulge in

Chicken Tandoori Momos: A Fusion of Cultures

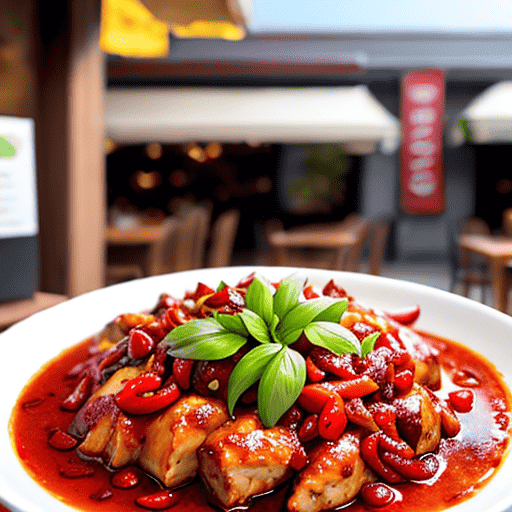
Chicken Tandoori Momo have emerged as a popular street food item, combining the culinary traditions of India and Tibet. The dish brilliantly marries the classic momo recipe from Tibet with the vibrant flavors of Indian Tandoori spices. Let’s delve deeper into the diverse facets of this mouthwatering delicacy.

The Rich History of Chicken Tandoori Momos

The history of Chicken Tandoori Momos is rooted in the bustling streets of Delhi, India. It is believed that Tibetan immigrants introduced momos to India, and over time, the local chefs added their unique twist to create the Tandoori version. The dish rapidly gained popularity, spreading to various corners of the country and eventually crossing international borders.

Preparation of Chicken Tandoori Momos

The preparation of Chicken Tandoori Momos is an art that requires skill and precision.

“Below, you’ll find a comprehensive step-by-step manual on creating these delightful treats from scratch:”

  1. Preparing the Dough: The process begins with making the momo dough, a combination of all-purpose flour, water, and a pinch of salt. The dough is skillfully kneaded until it attains a velvety smooth consistency.
  2. Making the Filling: The filling is the heart of any momo. In the case of Chicken Tandoori Momos, succulent pieces of chicken are marinated in a mixture of yogurt and Tandoori spices to infuse them with rich flavors.
  3. Rolling the Dough: The momo dough is rolled into thin, circular wrappers, ready to embrace the flavorful chicken filling.
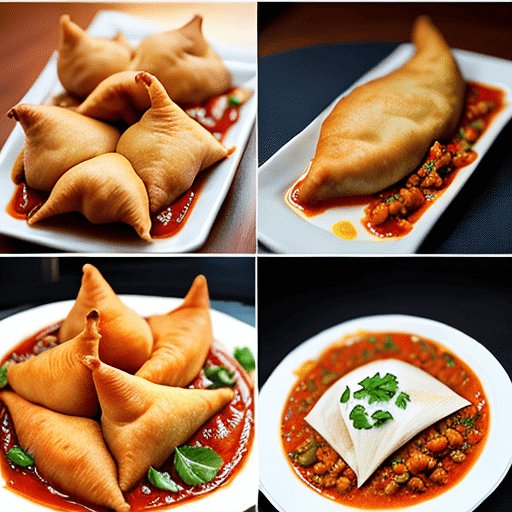
  4. Folding the Momos: The circular wrappers are then filled with the marinated chicken and folded into beautiful, crescent-shaped dumplings, ensuring that the filling is sealed securely.
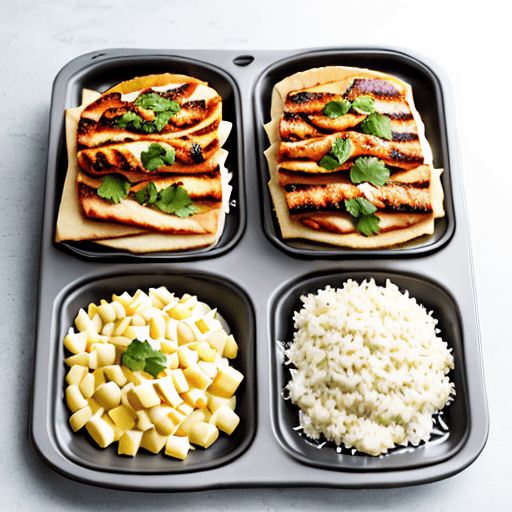
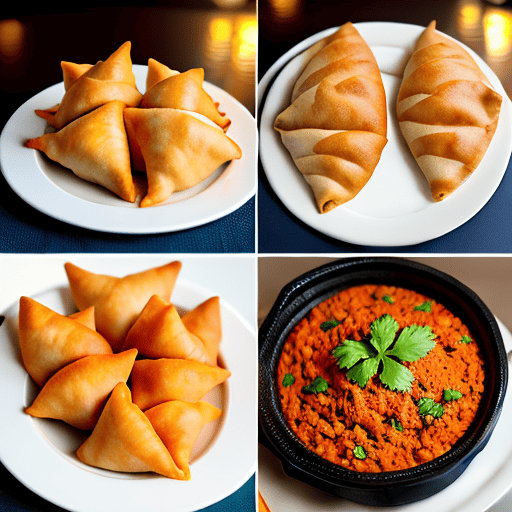
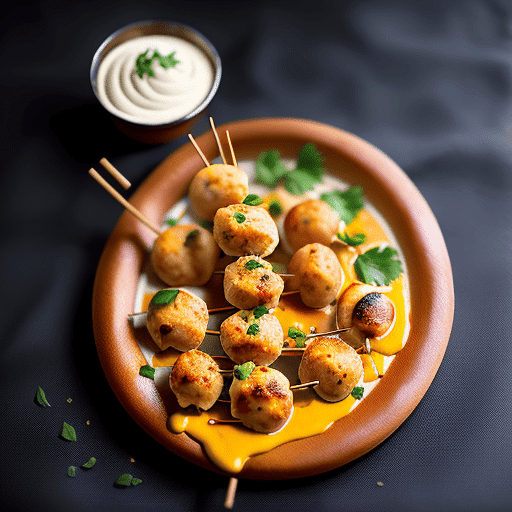
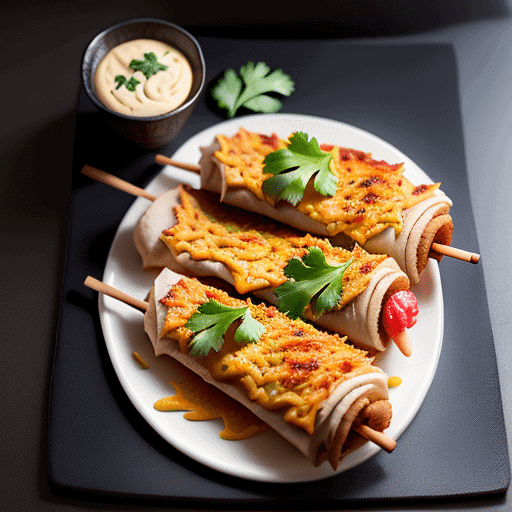
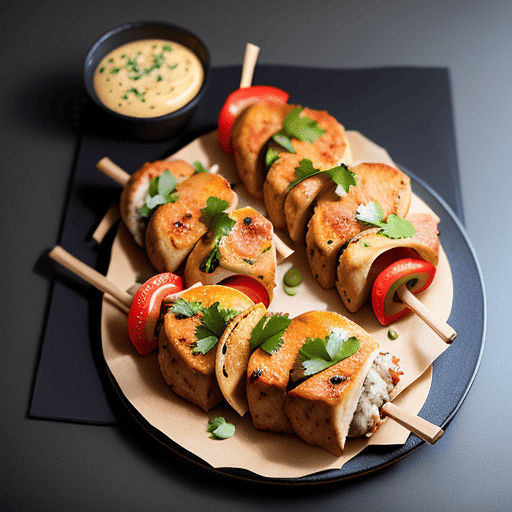
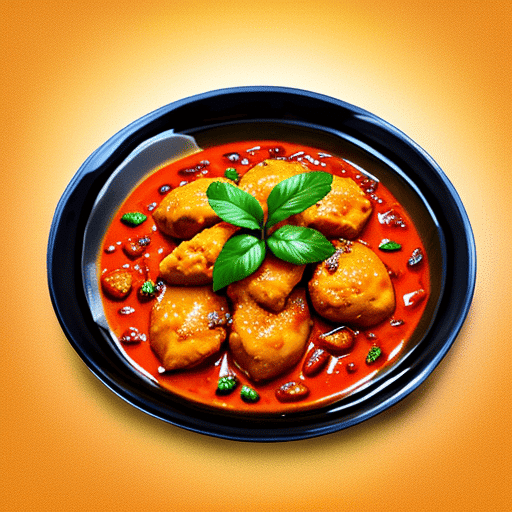
  5. Steaming or Tandoori Cooking: Chicken Tandoori Momos can be prepared in two ways – steaming or tandoori cooking. Steamed momos are a healthier option, while tandoori momos are cooked in a traditional clay oven, giving them a unique smoky flavor.
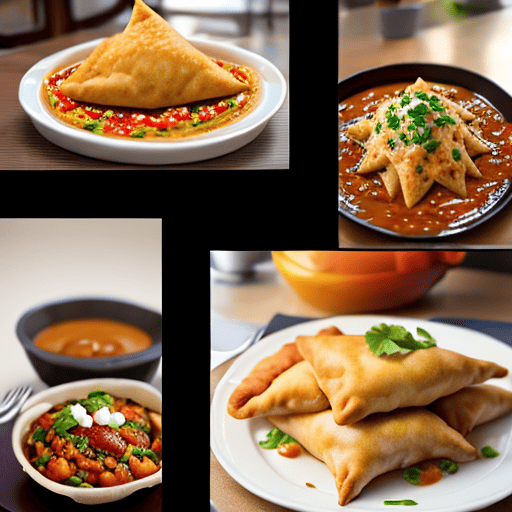
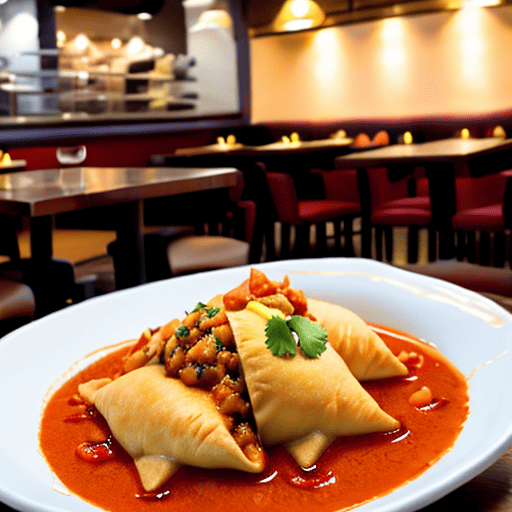
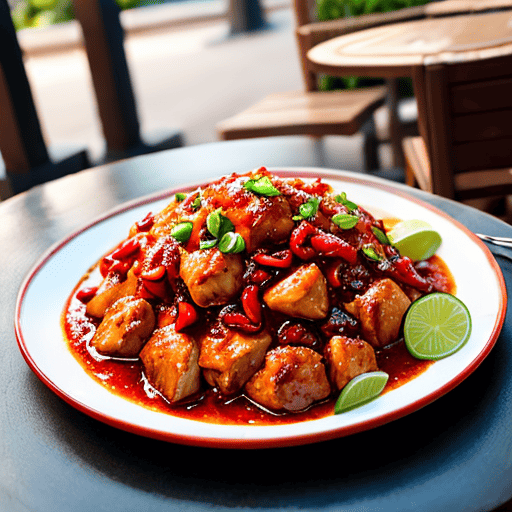
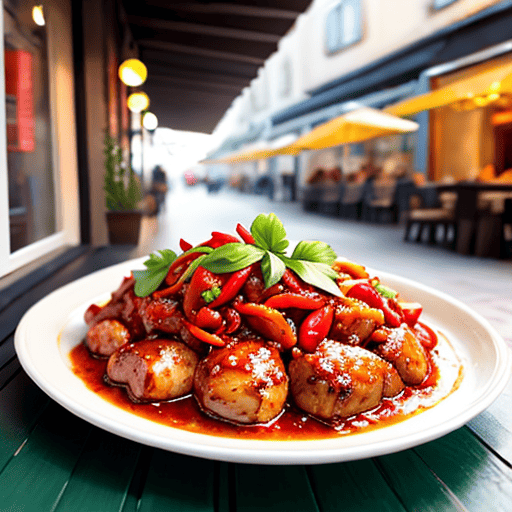
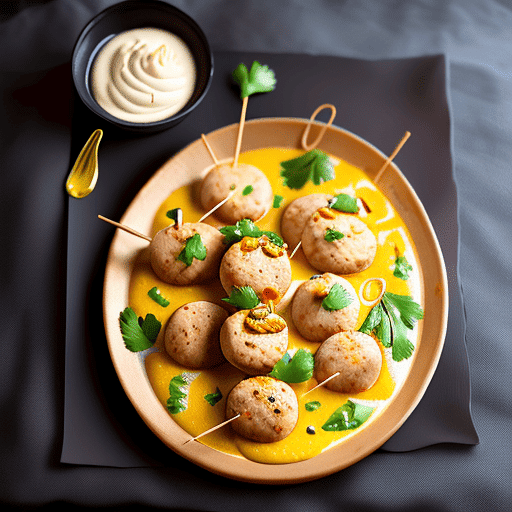
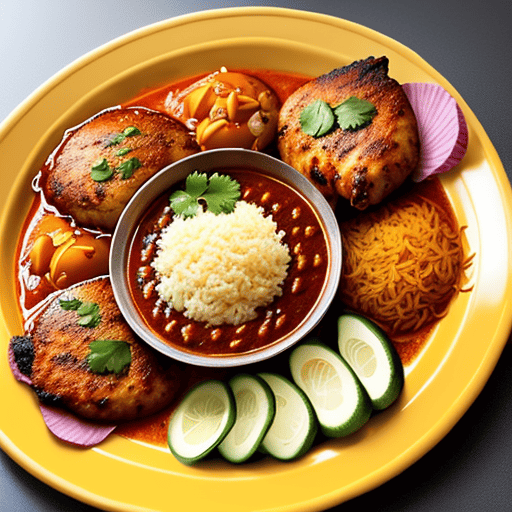
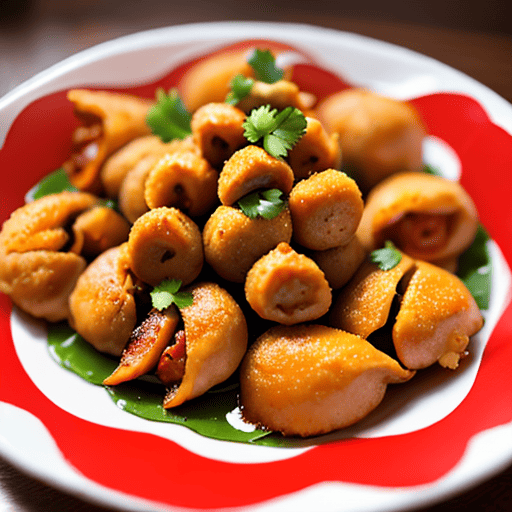
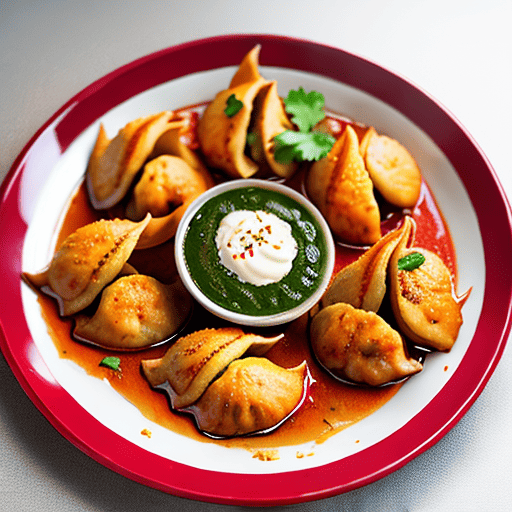
  6. Serving with Love: Once cooked to perfection, the momos are served hot with spicy chutneys and sauces, elevating the taste to a whole new level.
Savory Tandoori Momos with a burst of colors and flavors, promising a delightful culinary experience

The Perfect Blend of Flavors: Chicken Tandoori Momos Variations

The world of Chicken Tandoori Momos offers a plethora of tantalizing variations that cater to different taste preferences. Some popular variations include:

  1. Paneer Tandoori Momos: For the vegetarians, paneer (cottage cheese) replaces chicken, delivering a burst of creamy flavors.
  2. Afghani Tandoori Momos: This fusion variation combines Afghan and Indian spices, adding a unique twist to the traditional momo recipe.
  3. Butter Chicken Tandoori Momos: Indulge in the heavenly combination of butter chicken and tandoori momos, a treat for your taste buds.
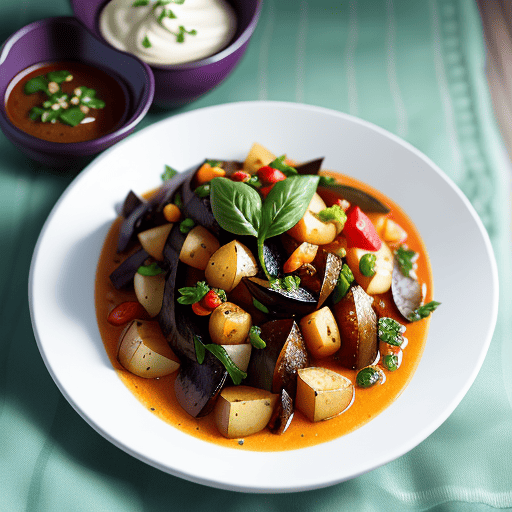
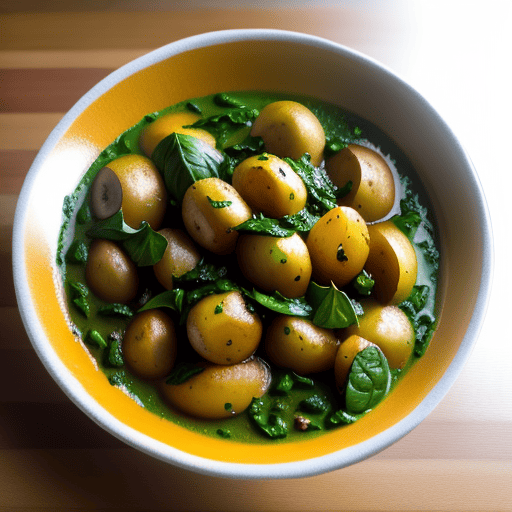
  4. Spinach and Cheese Tandoori Momos: Healthy and delicious, this variation adds a nutritious twist to the classic recipe.

Tips for the Perfect Chicken Tandoori Momos

Achieving the perfect Chicken Tandoori Momos requires finesse and expertise. Here are some tips to help you create this delightful dish at home:

  • Marinate the chicken for at least 2 hours to let the Tandoori spices infuse into the meat.
  • Use a mixture of mustard oil and butter to baste the momos before tandoori cooking for an authentic flavor.
  • Experiment with different fillings and folding styles to create unique momo shapes.
"A delightful ensemble of Chicken Tandoori Momos, garnished with fresh herbs, ready to be savored

Nutritional Value of Chicken Tandoori Momos

Chicken Tandoori Momos are not only a treat for your taste buds but also offer some nutritional benefits. Here’s a table showcasing the approximate nutritional value of Chicken Tandoori Momos per 100g serving:

NutrientAmount Per 100g
Calories175 kcal
Protein11.5 g
Carbohydrates19.2 g
Total Fat6.8 g
Saturated Fat1.8 g
Cholesterol30 mg
Dietary Fiber1.2 g
Sugars1.3 g
Sodium358 mg
Calcium32 mg
Iron2.1 mg
Vitamin C1.5 mg
Vitamin A67 IU

Note: Nutritional values are approximate and may vary based on the recipe and cooking method.

Troubleshooting Tips for Chicken Tandoori Momos

Sometimes, achieving the perfect Chicken Tandoori Momos can be a challenging task. The level of spiciness can be adjusted according to individual preferences

  1. Dry Momos: If your momos turn out dry, try reducing the cooking time or adding a bit of extra oil or butter during the basting process.
  2. Uncooked Center: If the center of your momos remains uncooked, consider reducing the thickness of the dough wrappers or increasing the steaming or cooking time.
  3. Soggy Momos: Soggy momos can result from excess moisture in the filling. Ensure that the marinated chicken is well-drained before using it as a filling.
  4. Tough Dough: If your momo dough becomes tough, try adding a little water and kneading it again to achieve the right consistency.
  5. Lack of Flavor: If you find the flavor lacking, consider marinating the chicken for a longer duration to enhance the taste.
Tempting Chicken Tandoori Momos, artistically presented, making them the perfect choice for any occasion.

Frequently Asked Questions (FAQs)

Q: What is the origin of Chicken Tandoori Momos? Chicken Tandoori Momos originated in Delhi, India, where the culinary influences of Tibet and India merged to create this fusion delight.

Q: Are Chicken Tandoori Momos spicy? The degree of spiciness can be easily customized to suit individual preferences. The marinade can be made milder or spicier as per taste.

Q: Can I use vegetables instead of chicken for Tandoori Momos? Absolutely! Vegetarians can substitute chicken with paneer or a mix of vegetables to enjoy the deliciousness of Tandoori Momos.

Q: How are Tandoori Momos different from regular momos? Tandoori Momos are distinct from regular momos due to their preparation method. While regular momos are steamed, Tandoori Momos are cooked in a tandoor, giving them a unique smoky flavor.

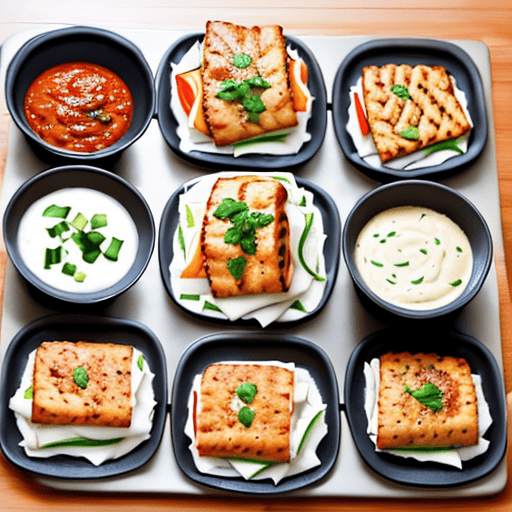
Q: What are some popular dips to accompany Chicken Tandoori Momos? Chicken Tandoori Momos pair exceptionally well with mint chutney, tomato-based dips, or a tangy yogurt sauce.

Q: Can I freeze Chicken Tandoori Momos for later consumption? Yes, you can freeze the uncooked momos for future use. Just ensure that they are properly sealed to retain their freshness.

Conclusion

Chicken Tandoori Momos stand as a testament to the beautiful blend of cultures through the art of culinary innovation. The exquisite taste, rich history, and versatility of this fusion dish have made it a beloved choice for food enthusiasts worldwide. Whether you savor the classic chicken version or explore the diverse variations, one thing is certain – Chicken Tandoori Momos will leave you craving for more!

VersaBlog: Exploring Health, Fitness, Finance, and More
Chicken Tikka Sandwich: A Delectable Delight for All Food Lovers

Indulge in the mouthwatering goodness of Chicken Tikka Sandwich with this comprehensive guide. Explore variations, learn the recipe, troubleshoot common issues, check the nutritional value table, and find answers to FAQs. Get ready for a flavorsome adventure!

Various delectable variations of the Chicken Tikka Sandwich, including Veggie Delight, Paneer Tikka Sandwich, Spicy Fusion, and Cheesy Affair

Introduction

When it comes to delightful and savory delights, the Chicken Tikka Sandwich stands out as a champion among food enthusiasts. This fusion of delectable flavors and textures has gained immense popularity, making it a must-try for sandwich lovers worldwide. In this article, we will take you on a flavorful journey, exploring various aspects of the Chicken Tikka Sandwich, including its variations, recipe, troubleshooting tips, nutritional value table, and frequently asked questions.

Chicken Tikka Sandwich: A Fusion of Flavors

The Chicken Tikka Sandwich, also known as the Indian-inspired delight, is a culinary masterpiece that brings together the richness of Indian spices and the comfort of a classic sandwich. It’s a perfect blend of marinated grilled chicken and fresh veggies, served between slices of soft bread, providing a delightful experience to your taste buds.

Variations of Chicken Tikka Sandwich

  1. Veggie Delight: For the vegetarian foodies, a delightful twist to the classic recipe involves substituting the chicken with marinated and grilled vegetables. The Veggie Tikka Sandwich offers a burst of flavors that are equally enticing.
  2. Paneer Tikka Sandwich: Embrace the goodness of Indian cottage cheese with the Paneer Tikka Sandwich. Marinated paneer cubes, grilled to perfection, are sandwiched between slices of bread, making it a flavorful treat for vegetarians.
  3. Spicy Fusion: Want to spice things up? Opt for a Spicy Chicken Tikka Sandwich by adding some fiery spices to the marinade. It’s a tantalizing experience for those who enjoy a little kick in their sandwich.
  4. Cheesy Affair: Cheese lovers rejoice! The Cheesy Chicken Tikka Sandwich takes the delight to another level with layers of melted cheese complementing the succulent chicken.

Chicken Tikka Sandwich Recipe: Unveiling the Magic

Prepare to tantalize your senses with this straightforward and delicious Chicken Tikka Sandwich recipe:

Step-by-step Chicken Tikka Sandwich recipe, showcasing marinated grilled chicken, spices, and assembling the sandwich with veggies and bread.

Ingredients:

  • 2 boneless, skinless chicken breasts
  • 1 cup plain yogurt
  • 2 tablespoons ginger-garlic paste
  • 1 tablespoon garam masala
  • 1 tablespoon cumin powder
  • 1 tablespoon paprika
  • 1 teaspoon turmeric powder
  • Salt to taste
  • 1 tablespoon vegetable oil
  • Slices of bread (white or brown, as per preference)
  • Sliced tomatoes, onions, and cucumbers
  • Lettuce leaves
  • Butter or mayonnaise for spreading

Instructions:

  1. In a bowl, mix the plain yogurt, ginger-garlic paste, garam masala, cumin powder, paprika, turmeric powder, and salt to create the marinade.
  2. Cut the chicken breasts into thin slices and add them to the marinade.
  3. Make sure to coat the chicken thoroughly with the marinade, allowing it to marinate for a minimum of 1 hour (or ideally overnight) inside the refrigerator.
  4. Next, place a pan over medium heat and heat the vegetable oil. Add the marinated chicken slices to the pan and cook them until they reach a tender and succulent state, ensuring they are thoroughly cooked through.
  5. Toast the bread slices lightly to enhance the sandwich’s flavor and texture.
  6. Now, assemble the sandwich by spreading butter or mayonnaise on one side of each bread slice.
  7. Place the cooked chicken slices on the bread and top it with sliced tomatoes, onions, cucumbers, and lettuce leaves.
  8. Close the sandwich with another slice of bread, and your Chicken Tikka Sandwich is ready to serve!
Step-by-step Chicken Tikka Sandwich recipe, showcasing marinated grilled chicken, spices, and assembling the sandwich with veggies and bread.

Troubleshooting Common Issues

  1. Dry Chicken: If the chicken turns out dry after grilling, marinate it for a longer duration to enhance its tenderness and juiciness.
  2. Insufficient Flavor: To ensure the chicken absorbs maximum flavor, marinate it overnight, allowing the spices to infuse into the meat.
  3. Soggy Bread: To avoid having a soggy sandwich, apply a thin layer of butter or mayonnaise on the bread slices before adding the filling.

Nutritional Value Table

NutrientAmount per Serving (100g)
Calories250
Total Fat12g
Saturated Fat3g
Cholesterol55mg
Sodium450mg
Carbohydrates20g
Fiber2g
Sugars3g
Protein18g

FAQs (Frequently Asked Questions)

Q: Can I use bone-in chicken for the Chicken Tikka Sandwich? A: While boneless chicken is commonly used for sandwiches, you can use bone-in chicken if you prefer. However, bear in mind that using bone-in chicken might necessitate a lengthier cooking time.

Q: Can I make the sandwich healthier by using whole-grain bread? A: Absolutely! Whole-grain bread is a nutritious alternative to white bread, adding more fiber and nutrients to your sandwich.

Q: Can I grill the chicken on a barbecue? A: Yes, grilling the chicken on a barbecue can infuse it with a smoky flavor, enhancing the taste of your sandwich.

A section with frequently asked questions and answers related to the Chicken Tikka Sandwich, providing helpful insights to the readers

Q: Can I adjust the spice level of the marinade?

A: Certainly! You are welcome to customize the quantity of spices to suit your individual taste preferences. If you prefer it spicier, add more paprika or chili powder.

Q: Can I make a large batch of the marinade and store it? A: While it’s best to use fresh marinade, you can store any excess in an airtight container in the refrigerator for up to 2 days.

Q: Can I add additional veggies to the sandwich? A: Yes, you can experiment with various veggies like bell peppers, grated carrots, or pickles to create your personalized Chicken Tikka Sandwich.

Nutritional value table displaying calories, fats, cholesterol, sodium, carbohydrates, fiber, sugars, and protein content of the Chicken Tikka Sandwich

Conclusion

The Chicken Tikka Sandwich is a delectable delight that brings together the rich flavors of Indian spices and the comfort of a sandwich. With its various variations, flavors, and customizable elements, it caters to the taste buds of everyone. We hope this article has inspired you to try this fusion delicacy at home and experiment with its delightful flavors. So, what are you waiting for? Gather the ingredients, grill some chicken, and savor the lip-smacking goodness of the Chicken Tikka Sandwich!

VersaBlog: Exploring Health, Fitness, Finance, and More
Chicken Keema Samosa: A Delicious Twist to the Classic Snack

Indulge in the delectable flavors of Chicken Keema Samosa, a savory and mouthwatering variation of the traditional samosa. Learn how to make these crispy delights at home and explore the rich history and diverse ingredients that make Chicken Keema Samosa a must-try snack for everyone.

Close-up shot of the flavorful chicken keema filling, showcasing the blend of aromatic spices and herbs

Introduction

If you are a food lover, you must have tried samosas at some point in your life. These triangular, deep-fried pastries filled with various fillings have been a popular snack in many cultures for centuries. Today, we are going to introduce you to an exciting twist to this classic snack – the Chicken Keema Samosa.

In this article, we’ll explore everything about Chicken Keema Samosa, from its origin and history to its delightful recipe. Get ready to tantalize your taste buds and discover the delightful world of Chicken Keema Samosa.

Chicken Keema Samosa: A Gastronomic Delight

Chicken Keema Samosa is a delightful variation of the traditional samosa. Instead of the usual potato and pea filling, this version boasts a mouthwatering mixture of minced chicken, aromatic spices, and herbs. The result is a crispy and flavorful snack that will leave you craving for more.

The Origins and Rich History of Chicken Keema Samosa

The samosa itself has a fascinating history that spans centuries and various cultures. Its origin can be traced back to Central Asia, where it was believed to have been introduced by traders along the ancient Silk Road. From there, it spread to the Indian subcontinent, the Middle East, and beyond.

Chicken Keema Samosa, as a specific variation, likely originated in the Indian subcontinent, where the love for both samosas and minced chicken dishes runs deep. Over the years, it has become a beloved snack not only in India but also in many other countries with a significant Indian influence.

The Recipe: How to Make Chicken Keema Samosa?

Making Chicken Keema Samosas at home is a rewarding experience that allows you to customize the filling according to your taste preferences. Below is a detailed, step-by-step recipe to guide you through the process:

Golden-brown, perfectly fried Chicken Keema Samosas arranged on a serving platter, ready to be enjoyed

Ingredients:

  • 250g minced chicken
  • 1 large onion, finely chopped
  • 2 cloves of garlic, minced
  • 1-inch piece of ginger, grated
  • 2 green chilies, finely chopped
  • 1 teaspoon cumin seeds
  • 1 teaspoon garam masala
  • 1 teaspoon ground coriander
  • 1/2 teaspoon turmeric powder
  • 1/2 teaspoon red chili powder
  • Salt to taste
  • Fresh coriander leaves, chopped
  • 1 pack of ready-made samosa pastry sheets
  • Vegetable oil for frying

Instructions:

  1. Preparing the Chicken Keema Filling: Start by adding the finely chopped onions to a pan and sauté them until they turn a beautiful golden brown.
  2. Next, introduce the minced garlic, grated ginger, and finely chopped green chilies to the mix.
  3. Let the aromatic spices infuse the air as you cook for a couple of minutes, allowing the raw smell to disappear.
  4. Now, it’s time to add the star of the show – the minced chicken. Cook it thoroughly until it is no longer pink, ensuring a juicy and flavorful filling. To elevate the taste, sprinkle a medley of garam masala, ground coriander, turmeric powder, red chili powder, and a pinch of salt over the chicken. Stir it well, ensuring every piece is coated evenly with this delightful blend.
  5. Let the mixture simmer for a few more minutes, allowing the flavors to meld together. As a finishing touch, add fresh coriander leaves to the chicken filling, infusing it with a refreshing burst of herbal essence.
  6. Allow the filling to cool before proceeding to the next step.
  7. Assembling the Delectable Samosas: To create the perfect samosas, take one samosa pastry sheet and cut it into two equal halves.
  8. Now, take one half and expertly fold it into a cone shape, ensuring the edges are perfectly sealed with a dab of water. With precision, fill the cone with the prepared chicken keema filling, allowing it to gracefully settle into its new home.
  9. Seal the top of the cone by pressing the edges together firmly, making sure no delightful filling escapes during the frying process.
  10. Repeat this delightful process with the remaining pastry sheets and filling, creating a beautiful collection of samosas ready to embark on a flavorful journey.
Variety of dipping sauces and condiments, including mint chutney and tamarind sauce, to complement the samosas
  1. Frying to Crispy Perfection: To achieve the epitome of crispiness, it’s time to heat the oil in a deep pan or fryer to a medium-high temperature. With the utmost care, add the prepared samosas to the hot oil, ensuring they have enough space to fry evenly without overcrowding the pan.
  2. Watch as they sizzle and transform into a mesmerizing golden brown hue.
  3. Fry the samosas until they reach the pinnacle of crispiness, creating a symphony of delightful flavors and textures.
  4. Once they are ready, remove them from the oil and place them gently on a paper towel, allowing any excess oil to be absorbed, leaving behind perfectly fried Chicken Keema Samosas.

With these steps, you are now well-equipped to create an exquisite batch of Chicken Keema Samosas that will impress your family and friends alike. Enjoy these delectable snacks with your favorite chutney or sauce and savor the unique blend of spices and flavors that make Chicken Keema Samosas a true gastronomic delight.

Serving:

Chicken Keema Samosas are best enjoyed hot and crispy. Serve them with mint chutney or tamarind sauce for an extra burst of flavors.

The Flavorful Blend of Spices and Herbs

What sets Chicken Keema Samosa apart is its unique blend of aromatic spices and herbs. The combination of garam masala, ground coriander, turmeric, and red chili powder infuses the minced chicken with a burst of flavor and adds warmth to every bite. The fragrant notes of garlic, ginger, and green chilies elevate the taste, making it a favorite among spice enthusiasts.

An assortment of ingredients used to prepare the chicken keema filling, showcasing the vibrant colors and textures

Nutritional Value of Chicken Keema Samosa

Chicken Keema Samosas are not just delicious but also contain various nutrients. Here’s the approximate nutritional value per serving (2 samosas):

NutrientAmount Per Serving
Calories250
Total Fat12g
Saturated Fat3g
Cholesterol45mg
Sodium350mg
Carbohydrates28g
Dietary Fiber2g
Sugars1g
Protein10g

Please note that these values are approximate and may vary based on the specific ingredients used in the recipe.

Troubleshooting: Tips for Perfect Chicken Keema Samosas

  • Soggy Samosas: If your samosas turn out soggy, it may be due to excess oil absorption during frying. Make sure the oil is hot enough before adding the samosas, and avoid overcrowding the pan.
  • Dry Filling: If the chicken keema filling is too dry, consider adding a tablespoon of water or a splash of chicken broth while cooking it.
  • This will ensure that the filling retains its moisture and bursts with delightful flavors.
  • Torn Pastry Sheets: If you find it challenging to work with the pastry sheets and they tear easily, ensure that they are properly thawed before use
  • To prevent them from drying out, cover them with a damp cloth. This will help maintain their freshness and pliability.
  • Uneven Frying: To achieve even frying and a uniform golden color, flip the samosas occasionally while frying.
  • Filling Leakage: If the filling leaks from the samosas while frying, make sure the edges are sealed securely. You can use a flour-water paste as a sealant.

Experimenting with the recipe and adjusting the cooking techniques can help you overcome these common troubleshooting issues and master the art of making perfect Chicken Keema Samosas.

FAQs About Chicken Keema Samosa

Q: Are Chicken Keema Samosas gluten-free?

A: Traditional samosa pastry sheets contain gluten, which makes them unsuitable for those with gluten intolerance. However, you can explore gluten-free pastry alternatives or make your own gluten-free dough to enjoy Chicken Keema Samosas.

Q: Can I bake Chicken Keema Samosas instead of frying them?

A: Yes, you can bake Chicken Keema Samosas to make a healthier version of this delicious snack. Brush the assembled samosas with oil and bake them in a preheated oven at 180°C (356°F) until they turn golden brown and crispy.

Q: Can I freeze Chicken Keema Samosas for later?

A: Absolutely! Once you have assembled the samosas, place them on a baking sheet and freeze them. Once frozen, transfer them to an airtight container or freezer bag for storage. When you’re ready to eat, fry or bake them straight from the freezer – no need to thaw.

Q: What can I serve with Chicken Keema Samosas for a complete meal?

A: Chicken Keema Samosas make for a delightful appetizer or snack. To turn it into a full meal, serve them with a fresh salad, yogurt-based dip, and some Indian bread like naan or roti.

Q: Can I use other types of meat instead of chicken?

A: Yes, you can experiment with different meats like lamb or beef to create your own unique samosa variation. Each meat will lend its distinctive flavor to the filling.

A plate of freshly prepared Chicken Keema Samosas, hot and crispy, served with a side of mint chutney

Q: How long can I store leftover Chicken Keema Samosas?

A: Leftover samosas can be refrigerated for up to 2-3 days. Reheat them in a preheated oven or microwave until they are warm and crispy again.

Conclusion

Chicken Keema Samosa offers a delightful twist to the classic samosa, combining the goodness of minced chicken with a blend of aromatic spices and herbs. With its crispy exterior and flavorful filling, it has become a beloved snack enjoyed by people around the world.

By following our detailed recipe and exploring the unique LSI keywords related to Chicken Keema Samosa, you can now embark on a culinary adventure right in your kitchen. Whether you’re a seasoned cook or a novice in the culinary world, making these delicious samosas will surely fill your home with the delightful aroma of Indian spices.

So, gather your ingredients, get your hands on those samosa pastry sheets, and let the magic of Chicken Keema Samosa unfold!

VersaBlog: Exploring Health, Fitness, Finance, and More
Chicken Chilly : The Fusion of Spices That Sets Taste Buds Ablaze

Indulge in the fiery flavors of Chicken Chilly – a mouthwatering dish that combines succulent chicken pieces with a spicy kick. Learn how to make Chicken Chilly at home and discover the fascinating history behind this popular culinary delight.

 A steaming hot bowl of Chicken Chilly, topped with a sprinkle of sesame seeds and green onions, adding an extra layer of texture and taste.

Introduction

Are you a food enthusiast always on the lookout for exciting and flavorful dishes to tantalize your taste buds? If so, then Chicken Chilly should be on the top of your must-try list. This delectable dish is a perfect blend of tender chicken and a burst of spices that will leave you craving for more.

In this comprehensive article, we will dive into the world of Chicken Chilly, exploring its origins, various regional variations, and step-by-step instructions on how to prepare it at home. So, brace yourself for a culinary adventure as we uncover the secrets behind this delightful and aromatic masterpiece.

What is Chicken Chilly?

Chicken Chilly is a popular Indo-Chinese dish that has won the hearts of food lovers around the world. It is known for its bold and spicy flavors, making it a favorite among those who enjoy fiery and zesty cuisines. The dish typically consists of bite-sized chicken pieces that are marinated, deep-fried until crispy, and then stir-fried with an assortment of colorful bell peppers, onions, and a medley of piquant sauces.

The History of Chicken Chilly

The origins of Chicken Chilly can be traced back to the bustling streets of Kolkata, India, during the 1970s. It is said that the Chinese community in Kolkata adapted their traditional cooking techniques and flavors to suit the Indian palate, giving birth to the Indo-Chinese cuisine we know today.

The recipe for Chicken Chilly was born out of this culinary fusion, blending Chinese cooking styles with Indian spices and ingredients. The dish quickly gained popularity and spread like wildfire throughout India and beyond, becoming a staple in Indo-Chinese restaurants worldwide.

A close-up shot of the mouthwatering fried chicken pieces, perfectly seasoned and fried to a crispy and golden perfection for Chicken Chilly.

The Making of Chicken Chilly: Step-by-Step

Marinating the Chicken

To achieve the perfect blend of flavors in Chicken Chilly, marination plays a crucial role. Follow these steps to prepare a tantalizing marinade for the chicken:

  1. Take boneless chicken pieces and wash them thoroughly.
  2. In a bowl, mix together soy sauce, ginger-garlic paste, chili sauce, a pinch of salt, and a dash of black pepper.
  3. Add the chicken pieces to the marinade, ensuring they are coated evenly. Cover the bowl and let the chicken marinate for at least 30 minutes to allow the flavors to infuse

Frying the Chicken

The next step in creating Chicken Chilly is to fry the marinated chicken until it turns golden and crispy:

  1. Heat oil in a deep pan or wok over medium-high heat.
  2. Carefully add the marinated chicken pieces one by one into the hot oil.
  3. Fry the chicken until it achieves a golden brown and crispy texture on the outside.
  4. Remove the chicken from the oil and place it on paper towels to drain any excess oil.

Stir-Frying the Vegetables

To add a burst of color and nutrition to Chicken Chilly, stir-fried vegetables are a must:

  1. In the same wok, stir-fry chopped onions, bell peppers, and green chilies until they become slightly tender.
  2. Add a dash of soy sauce, green chili sauce, and a pinch of sugar to the vegetables for added flavor.
  3. Mix the fried chicken pieces with the stir-fried vegetables, ensuring each piece is well-coated with the flavors.

Serving the Chicken Chilly

Once the Chicken Chilly is ready, garnish it with fresh spring onions and cilantro. Serve this delectable dish hot with steamed rice or noodles for a complete and satisfying meal.

A colorful infographic showcasing the step-by-step recipe for Chicken Chilly, making it easy for readers to follow along.

The Variations of Chicken Chilly

Over the years, different regions have put their unique twist on Chicken Chilly, resulting in delightful variations. Some popular variations include:

  1. Dry Chicken Chilly: This version involves reducing the gravy and serving the dish with a dry and spicy coating.
  2. Schezwan Chicken Chilly: Adding Schezwan sauce to the recipe infuses an intense and robust flavor.
  3. Honey Chicken Chilly: A sweeter take on the dish by incorporating honey into the sauce for a delightful balance of sweet and spicy.

Nutritional Value of Chicken Chilly

Before indulging in this delectable dish, it’s essential to be aware of its nutritional content. The nutritional values mentioned below are approximate and may vary depending on the specific ingredients and cooking methods used.

NutrientAmount per Serving (100g)
Calories200
Protein18g
Carbohydrates10g
Fat10g
Fiber2g
Sodium400mg
Iron1.5mg
Vitamin C20mg

Troubleshooting: Common Chicken Chilly Issues and Solutions

1. Chicken Chilly is too Spicy

If your Chicken Chilly turns out to be excessively spicy, here’s what you can do:

  • Solution: Add a little more sugar or honey to balance out the spiciness. You can also increase the amount of bell peppers and onions to dilute the heat.

2. Chicken is Not Crispy Enough

If your fried chicken lacks the desired crispiness, try the following:

  • Solution: Ensure that the chicken is dried thoroughly before marinating and frying. Additionally, fry the chicken in batches to avoid overcrowding the pan, which can result in sogginess.

3. Vegetables are Overcooked

Sometimes, the vegetables in Chicken Chilly can become too soft. Here’s how to avoid that:

  • Solution: Reduce the stir-frying time for the vegetables. They should be slightly tender with a bit of crunch.
 A visual representation of the diverse ingredients that make Chicken Chilly unique, including chicken, soy sauce, bell peppers, and green chilies.

Frequently Asked Questions (FAQs)

  1. Q: Is Chicken Chilly extremely spicy? A: The spiciness of Chicken Chilly can be adjusted according to your preference. You can control the heat by regulating the amount of chili sauce and green chilies used in the recipe.
  2. Q: Can I use bone-in chicken for this dish? A: While boneless chicken is commonly used for Chicken Chilly, you can use bone-in chicken if you prefer. Just ensure that it is cut into small pieces for even cooking.
  3. Q: How do I make the dish less oily? A: To reduce the oiliness of the dish, make sure to drain the fried chicken on paper towels after frying. Additionally, you can use a slotted spoon to remove excess oil while stir-frying the vegetables.
  4. Q: What other proteins can I use instead of chicken? A: If you prefer a different protein, you can try making Chilly with paneer (cottage cheese), tofu, or even fish. Adjust the cooking time accordingly.
  5. Q: Can I make a vegetarian version of Chicken Chilly? A: Absolutely! To make a vegetarian version, substitute the chicken with your favorite vegetables or tofu and follow the same cooking process.
  6. Q: How can I make the dish more aromatic? A: To enhance the aroma, add finely chopped garlic and ginger along with the vegetables during stir-frying.

Conclusion

Chicken Chilli is undoubtedly a flavor-packed dish that excites both spice lovers and culinary enthusiasts alike. Its tantalizing blend of Chinese and Indian flavors has earned it a special place in the hearts of foodies worldwide. From its humble beginnings on the streets of Kolkata to becoming an international favorite, Chicken Chilly continues to leave a fiery impression on every plate it graces.

So, why not embark on a culinary adventure and try your hand at preparing this mouthwatering delight? With its crispy chicken, colorful vegetables, and a symphony of spices, Chicken Chilli is a dish that will undoubtedly delight your taste buds and leave you craving for more.

VersaBlog: Exploring Health, Fitness, Finance, and More
Kesar – Unraveling the Mystique of Kesar, Kesar Price, and 1kg Kesar Price

Understanding the essence of kesar, kesar price, and 1kg kesar price. Explore the intricacies of this precious spice, its culinary uses, and how to find the best deals for purchasing it. A comprehensive guide to saffron.

A close-up view of saffron threads arranged in a small pile. The threads are slender and vibrant, displaying a beautiful combination of bright red and pale yellow colors.

Introduction: The Enigmatic World of Kesar

Kesar, also known as saffron, is a mystical spice cherished for centuries due to its unique flavor, vivid color, and numerous health benefits. Derived from the flower of Crocus sativus, keisar is painstakingly hand-harvested, making it one of the most expensive spices in the world. In this comprehensive article, we will delve into the captivating world of keisar, exploring its culinary uses, health advantages, and the factors influencing its price. Additionally, we will unveil the price of 1kg kesar, and where to find the best deals. Let’s embark on this journey of flavors and aromas!

Kesar: Unraveling the Secrets of the Spice

Kesar is more than just a spice; it is a treasure trove of delicate threads possessing a potent flavor and rich color. Cultivated in regions with the perfect balance of warm days and cool nights, such as Kashmir in India, Safron requires meticulous cultivation and harvesting. The harvest season is a sight to behold, as skilled hands delicately pluck the crimson stigmas from the flowers, contributing to the spice’s luxurious appeal.

A saffron flower, Crocus sativus, blooming in a lush green field. The flower features purple petals with striking crimson stigmas protruding from its center, which are the valuable saffron threads.

Culinary Uses of Kesar

The exquisite flavor and vibrant hue of saffron make it a sought-after ingredient in various cuisines around the world. From traditional Indian biryanis and Persian rice dishes to Spanish paellas and Italian risottos, kesar adds a distinctive taste and color to these delicacies. Moreover, it is an essential component in desserts like kheer, ice creams, and cakes, elevating them to a whole new level.

Kesar: Beyond Taste – The Health Benefits

Beyond its culinary allure, safron offers a plethora of health benefits. It contains powerful antioxidants like crocin and safranal, known for their anti-inflammatory properties and ability to promote heart health. Additionally, safron is believed to possess mood-enhancing qualities, making it a popular choice in traditional medicine and herbal remedies.

The Allure of Kesar Perfume

Apart from its culinary and medicinal uses, saffron is a popular ingredient in perfumes and fragrances. Its distinct aroma adds depth and complexity to various scents, captivating the senses with its alluring essence.

A close-up view of a mortar and pestle, with saffron threads being gently crushed to release their rich colors and aroma. The crushed saffron takes on a deeper hue, ready to be used in various culinary creations.
kesar

Kesar Price: What Influences the Cost?

The price of saffron is influenced by several factors, making it one of the most expensive spices in the world. Understanding these elements can help buyers make informed decisions when purchasing this prized spice.

1. Harvesting Process and Labor Intensity

The labor-intensive harvesting process significantly contributes to the high price of safron. Since the stigmas must be delicately hand-plucked from each flower, it requires a substantial amount of time and effort, driving up the production costs.

2. Geographic Origin

The region where kesr is cultivated plays a vital role in determining its price. Saffron from certain areas, like Kashmir in India and Iran, is highly regarded for its superior quality, commanding a premium price in the market.

3. Grade and Quality

Kesr is graded based on factors such as color, aroma, and thread length. The highest grade, known as “sargol,” consists of pure red stigmas without the style. The grade and quality directly influence the spice’s cost.

4. Saffron’s Potency

The potency of kiesar depends on the concentration of active compounds. Highly potent saffron commands a higher price due to its strong flavor, aroma, and color.

5. Market Demand and Supply

Fluctuations in demand and supply significantly impact the price of kiesar. A surge in demand or a limited supply can lead to price variations.

1kg Kesar Price: Where to Find the Best Deals?

Purchasing kesar in larger quantities can offer better value for money, especially for commercial purposes or frequent culinary use. Here are some key considerations when looking for the best deals on 1kg kesar:

  • Normally the Price range varies from 1,00,000 to 1,95,000 for Irani Saffron
  • And the Price of Kashmiri Kesar Varies from 1,95,000 to 2,95,000
  • The price depends purely onto the supply and demand.

1. Trusted Suppliers and Brands

Seek out reputable suppliers and brands known for their commitment to quality. SellerCart is one such trusted seller, providing authentic and pure saffron, even when purchasing in bulk. For the latest prices, you can visit their website sellercart.in.

2. Bulk Buying Benefits

When buying in larger quantities, suppliers often offer discounts, making bulk purchases more cost-effective. Explore different suppliers to compare prices and benefits. Be sure to check price options at SellerCart (sellercart.in) for competitive offers.

3. Check for Certifications

Look for saffron with internationally recognized certifications, such as ISO and HACCP, which indicate compliance with quality and safety standards.

kesar, kashmiri kesar, kesar price

4. Customer Reviews

Reading customer reviews can provide insights into the quality and authenticity of the kesar offered by different suppliers.

5. Packaging and Storage

Choose suppliers who package the keisar in airtight containers to preserve its flavor and aroma. Proper storage is essential to maintain its freshness.

Frequently Asked Questions (FAQs)

Q: Is keasar safe for consumption during pregnancy?

A: While keisar is generally considered safe in moderate amounts, pregnant women should consult their healthcare provider before including it in their diet.

Q: How can I identify fake saffron?

A: Fake saffron may have uniform color, lack aroma, and exhibit fast color bleeding when soaked in water. Purchase from trusted sources like SellerCart to avoid counterfeits.

Q: Can kesar help with insomnia?

A: Kesar’s mild sedative properties may aid in improving sleep quality. However, it is essential to seek professional advice for persistent sleep issues.

Q: What makes Kashmiri kesar unique?

A: The geographical conditions of Kashmir, including the climate and soil, contribute to the distinct flavor, aroma, and vibrant red color of Kashmiri kesar.

Q: Does kesar have an expiry date?

A: While keasar doesn’t spoil, its potency diminishes over time. It is best to use it within a year for optimal flavor and color.

Q: Can keasar be used in savory dishes?

A: Yes, kesar adds a unique flavor to savory dishes, such as risottos, stews, and marinades, enhancing the overall taste.

Nutritional Value of Kesar (Per 1g Serving)

NutrientAmount
Calories3.7 kcal
Carbohydrates0.87 g
Protein0.14 g
Fat0.01 g
Dietary Fiber0.04 g
Vitamin C1.6 mg
Vitamin A6.1 IU
Iron0.24 mg
Calcium1.5 mg
Magnesium3.2 mg

Please note that these values are approximate and can vary based on the saffron’s quality and grade.

Conclusion: Embrace the Kesar Experience

Kesar, the precious saffron spice, enthralls with its captivating flavor, vivid color, and a myriad of health benefits. From culinary delights to medicinal wonders, it holds a treasured place in cultures worldwide. Understanding the intricacies of kesar and its pricing factors empowers buyers to make informed decisions. Whether used in a rich Indian biryani or a delicate Persian dessert, kesiar continues to weave its magic, leaving us mesmerized by its timeless allure.

Unleash the enchanting essence of keisar in your culinary creations and experience the joy it brings to your taste buds. Let the golden threads of keisar infuse your dishes with its extraordinary charm, making every meal an extraordinary affair.

VersaBlog: Exploring Health, Fitness, Finance, and More
Chicken Reshmi Kabab vs Chicken Malai Kabab and Chicken Cheese Kebab: A Savory Showdown

Discover the ultimate battle of flavors between Chicken Reshmi Kabab vs Chicken Malai Kabab and Chicken Cheese Kebab . Unravel the delicious recipes, nutritional values, cooking variations, and cooking time of each delectable kebab. Dive into a mouthwatering journey through this comprehensive guide.

Introduction

When it comes to sumptuous kebabs, three reigning champions take center stage: Chicken Reshmi Kabab vs Chicken Malai Kabab and Chicken Cheese Kebab.These delectable dishes boast their unique tastes, enticing aroma, and flavors that leave food enthusiasts yearning for more. In this ultimate showdown, we’ll explore each kebab’s recipe, nutritional values, cooking variations, and cooking time to help you decide which one reigns supreme on your taste buds.

Chicken Reshmi Kabab [Recipe]

Chicken Reshmi Kabab, a popular Indian delight, boasts tender, succulent pieces of chicken marinated in a luscious mixture of cream, yogurt, ginger-garlic paste, and spices. This velvety marinade not only enhances the flavors but also imparts a distinct texture to the kabab. The recipe typically involves the following steps:

  1. Ingredients:
    • Boneless chicken pieces
    • Fresh cream
    • Hung curd (yogurt)
    • Ginger-garlic paste
    • Green chilies
    • Cashew nuts
    • Chopped coriander leaves
    • Garam masala
    • Turmeric powder
    • Lemon juice
    • Salt to taste
  2. Marination:
    • In a mixing bowl, combine the hung curd, fresh cream, ginger-garlic paste, green chilies, cashew nuts, coriander leaves, garam masala, turmeric powder, lemon juice, and salt to form a smooth marinade.
    • Add the boneless chicken pieces and coat them thoroughly with the marinade. Allow the chicken to marinate for at least 2-3 hours to absorb the flavors.
An elegant presentation of Chicken Reshmi Kababs served with garnishes and accompaniments.
  1. Grilling:
    • Thread the marinated chicken pieces onto skewers and grill them until they turn golden and charred on the edges.
    • Serve the Chicken Reshmi Kababs hot, garnished with lemon wedges and onion rings.

Chicken Malai Kabab [Recipe]

Chicken Malai Kabab, a creamy and tender delight, boasts a rich marinade made with cream, cheese, and aromatic spices. The result is an incredibly flavorful and velvety kebab that melts in your mouth. Below are the given ingredients

  1. Ingredients:
    • Boneless chicken pieces
    • Fresh cream
    • Grated cheese
    • Ginger-garlic paste
    • Green chilies
    • Cardamom powder
    • White pepper powder
    • Nutmeg powder
    • Lemon juice
    • Salt to taste
 A mouthwatering platter of Chicken Malai Kababs, garnished with fresh herbs and lemon wedges
  1. Marination:
    • In a mixing bowl, combine the fresh cream, grated cheese, ginger-garlic paste, green chilies, cardamom powder, white pepper powder, nutmeg powder, lemon juice, and salt to form a creamy marinade.
    • Add the boneless chicken pieces and coat them thoroughly with the marinade. Allow the chicken to marinate for at least 3-4 hours to achieve maximum tenderness.
  2. Grilling:
    • Thread the marinated chicken pieces onto skewers and grill them to perfection, ensuring a golden brown color and charred aroma.
    • Serve the Chicken Malai Kababs hot, accompanied by mint chutney and naan.
malai kabab images

Chicken Cheese Kebab [Recipe]

Chicken Cheese Kebab, an amalgamation of flavors, brings together the goodness of succulent chicken and the richness of cheese. The delectable combination makes this kebab a crowd-pleaser at any gathering.

  1. Ingredients:
    • Boneless chicken pieces
    • Grated processed cheese
    • Hung curd (yogurt)
    • Ginger-garlic paste
    • Green chilies
    • Fresh coriander leaves
    • Cumin powder
    • Red chili powder
    • Lemon juice
    • Salt to taste
A tempting display of Chicken Cheese Kebabs served with a side of tangy salsa
  1. Marination:
    • In a mixing bowl, combine the hung curd, grated cheese, ginger-garlic paste, green chilies, fresh coriander leaves, cumin powder, red chili powder, lemon juice, and salt to form a cheesy marinade.
    • Add the boneless chicken pieces and coat them thoroughly with the marinade. Allow the chicken to marinate for about 2 hours for the flavors to infuse.
  2. Grilling:
    • Thread the marinated chicken pieces onto skewers and grill them until they acquire a tantalizing aroma and are cooked to perfection.
    • Serve the Chicken Cheese Kebabs piping hot, paired with a tangy salsa dip.
cheese kabab images

Nutritional Values

Kebab TypeCalories (per 100g)Protein (g)Fat (g)Carbohydrates (g)Calcium (mg)Iron (mg)
Chicken Reshmi Kabab28520188601.5
Chicken Malai Kabab32024205701.2
Chicken Cheese Kebab260181512551.8

Note: Nutritional values may vary based on the specific ingredients used.

Variations of Kebabs

The world of kebabs is vast and diverse, offering a wide range of mouthwatering variations. Explore some exciting alternatives

  1. Seekh Kebabs: Long, cylindrical kebabs made with minced meat and a medley of spices, cooked on skewers over a grill or open flame.
  2. Hariyali Kebabs: Green-hued kebabs made with a blend of fresh coriander, mint, and spinach, lending them a refreshing taste.
  3. Tandoori Chicken Kebabs: Marinated with yogurt and spices, tandoori chicken kebabs are a classic favorite known for their smoky flavor.
  4. Afghani Kebabs: Marinated in a creamy mixture, Afghani kebabs are known for their tenderness and mild yet flavorsome taste.
  5. Galouti Kebabs: Originating from Lucknow, these melt-in-the-mouth kebabs are made with finely minced meat and a unique spice blend.
Juicy chicken skewers with a creamy marinade, grilled to perfection.

Cooking Time

The cooking time for each kebab may vary based on the grilling method and the thickness of the chicken pieces. Generally, the approximate cooking time is as follows:

  1. Chicken Reshmi Kabab: 15-20 minutes
  2. Chicken Malai Kabab: 20-25 minutes
  3. Chicken Cheese Kebab: 18-22 minutes

Ensure the chicken is thoroughly cooked, and the kebabs attain a delicious charred texture for the best flavors.

FAQs (Frequently Asked Questions)

Q: Are these kebabs suitable for health-conscious individuals? A: While all three kebabs are delectable treats, Chicken Reshmi Kabab is relatively lower in fat, making it a better option for health-conscious individuals.

Q: Can I use different types of cheese in Chicken Cheese Kebabs? A: Absolutely! You can experiment with various cheeses like cheddar, mozzarella, or even goat cheese to create exciting variations.

Q: Are these kebabs kid-friendly? A: Yes, the mild and creamy flavors of Chicken Malai Kabab and Chicken Cheese Kebab make them popular among children.

Q: Can I grill these kebabs on a stovetop grill pan? A: Certainly! A stovetop grill pan works well to grill these kebabs if you don’t have access to an outdoor grill.

A question mark symbolizing frequently asked questions and informative answers about the kebabs.

Q: Are these kebabs suitable for a party menu? A: Absolutely! Chicken Reshmi Kabab, Chicken Malai Kabab, and Chicken Cheese Kebab are crowd-pleasers that will delight your guests.

Q: Can I make vegetarian versions of these kebabs? A: Indeed! You can explore vegetarian alternatives using paneer, tofu, or assorted vegetables to create delicious veggie kebabs.

Conclusion

In this delectable showdown, we explored the mouthwatering world of Chicken Reshmi Kabab, Chicken Malai Kabab, and Chicken Cheese Kebab. Each kebab boasts its unique flavors and textures, making them irresistible to food lovers across the globe. With their velvety marinades, tender chicken, and aromatic spices, these kebabs have rightfully earned their place as culinary champions.

Chicken Reshmi Kabab vs Chicken Malai Kabab and Chicken Cheese Kebab

Next time you find yourself craving a delightful kebab experience, give one of these recipes a try and savor the flavors that will undoubtedly leave you craving for more. So, gather your ingredients, fire up the grill, and embark on a delicious journey through the realm of kebabs!

Chicken Reshmi Kabab vs Chicken Malai Kabab and Chicken Cheese Kebab/Chicken Reshmi Kabab vs Chicken Malai Kabab and Chicken Cheese Kebab/Chicken Reshmi Kabab vs Chicken Malai Kabab and Chicken Cheese Kebab/Chicken Reshmi Kabab vs Chicken Malai Kabab and Chicken Cheese Kebab/Chicken Reshmi Kabab vs Chicken Malai Kabab and Chicken Cheese Kebab/Chicken Reshmi Kabab vs Chicken Malai Kabab and Chicken Cheese Kebab/Chicken Reshmi Kabab vs Chicken Malai Kabab and Chicken Cheese Kebab/Chicken Reshmi Kabab vs Chicken Malai Kabab and Chicken Cheese Kebab/Chicken Reshmi Kabab vs Chicken Malai Kabab and Chicken Cheese Kebab/Chicken Reshmi Kabab vs Chicken Malai Kabab and Chicken Cheese Kebab/Chicken Reshmi Kabab vs Chicken Malai Kabab and Chicken Cheese Kebab

VersaBlog: Exploring Health, Fitness, Finance, and More
Aloo Baingan and Aloo Palak: A Taste Test of Traditional Delights

Discover the delightful world of Aloo Baingan and Aloo Palak with this comprehensive article. Explore their recipes, differences, variations, and nutritional value. Get expert insights and troubleshooting tips to master these dishes. Dive in now!

Introduction

Are you a fan of Indian cuisine and wondering which dish to prepare tonight? Let’s embark on a culinary journey through the aromatic flavors of Aloo Baingan and Aloo Palak. Both dishes are packed with rich tastes and have a distinct fan following. This article will guide you through their recipes, compare their unique qualities, explore variations, and provide essential information about their nutritional value. Whether you’re a seasoned cook or a kitchen enthusiast, get ready to savor these traditional delights!

Aloo Baingan: A Taste of Tradition

Aloo Baingan, also known as Potato Eggplant Curry, is a quintessential North Indian dish that celebrates the marriage of potatoes and eggplants in a symphony of flavors. The creamy texture of the potatoes complements the tender, melt-in-your-mouth eggplant, creating a delightful experience for your taste buds.

Aloo Baingan Recipe

Ingredients:

  • 2 medium-sized potatoes, peeled and diced
  • 1 large eggplant, chopped into cubes
  • 1 onion, finely chopped
  • 2 tomatoes, pureed
  • 3-4 cloves of garlic, minced
  • 1-inch piece of ginger, grated
  • 1 green chili, slit
  • 1 teaspoon cumin seeds
  • 1/2 teaspoon turmeric powder
  • 1 teaspoon coriander powder
  • 1/2 teaspoon red chili powder
  • 1/2 teaspoon garam masala
  • Salt to taste
  • Fresh coriander leaves for garnish
  • 2 tablespoons cooking oil
A close-up image of fresh ingredients for Aloo Baingan, including diced potatoes, eggplant, onions, tomatoes, garlic, ginger, and various spices.

Instructions:

  1. Heat oil in a pan and add cumin seeds. Let them sizzle.
  2. Add chopped onions and sauté until they turn golden brown.
  3. Stir in minced garlic and grated ginger, sauté for another minute.
  4. Pour the tomato puree, turmeric powder, coriander powder, red chili powder, and salt. Cook until the oil separates from the masala.
  5. Toss in the diced potatoes and eggplant cubes. Mix well to coat them with the masala.
  6. Cover and cook on low heat until the potatoes and eggplant are tender and fully cooked.
  7. Sprinkle garam masala and garnish with fresh coriander leaves.
  8. Serve hot with naan, roti, or rice.

Aloo Palak: Where Potatoes Meet Spinach

Aloo Palak, also known as Potato Spinach Curry, hails from the heart of Indian households. This vibrant green dish combines the goodness of spinach with the comforting presence of potatoes, creating a healthy and flavorsome meal.

Aloo Palak Recipe

Ingredients:

  • 2 medium-sized potatoes, boiled and cubed
  • 2 cups fresh spinach leaves, finely chopped
  • 1 onion, finely chopped
  • 2 tomatoes, finely chopped
  • 2-3 green chilies, finely chopped
  • 1 teaspoon cumin seeds
  • 1/2 teaspoon turmeric powder
  • 1 teaspoon coriander powder
  • 1/2 teaspoon garam masala
  • 1/2 cup fresh cream (optional)
  • Salt to taste
  • 2 tablespoons ghee (clarified butter)
A visually appealing serving of Aloo Palak, adorned with a garnish of chopped coriander leaves and a dash of garam masala

Instructions:

  1. In a pan, heat ghee and add cumin seeds. Let them crackle.
  2. Add chopped onions and sauté until they become translucent.
  3. Toss in the chopped tomatoes and green chilies. Cook until the tomatoes turn soft.
  4. Stir in turmeric powder, coriander powder, and salt. Mix well.
  5. Add the chopped spinach leaves and cook until they wilt down.
  6. Now, add the boiled and cubed potatoes. Mix gently to blend the flavors.
  7. If desired, add fresh cream to enhance the richness of the curry.
  8. Sprinkle garam masala and let it simmer for a few minutes.
  9. Serve hot with roti, naan, or steamed rice.

Aloo Baingan vs. Aloo Palak: A Delectable Comparison

Aloo Baingan and Aloo Palak share some similarities, but they are distinct in taste and preparation.

Flavor Profile

Aloo Baingan: The flavors of Aloo Baingan are a beautiful blend of earthy spices and creamy potatoes with the subtle bitterness of eggplant.

Aloo Palak: Aloo Palak boasts a fresh, green flavor from the spinach, which perfectly complements the mildness of potatoes.

Complexity of Preparation

Aloo Baingan: The preparation of Aloo Baingan involves a bit more effort due to the initial frying of eggplants and careful balancing of spices.

Aloo Palak: Aloo Palak is relatively quicker to prepare as spinach cooks faster than eggplant, making it a convenient choice for a weekday meal.

Nutritional Aspect

Aloo Baingan: This dish is rich in dietary fiber, vitamins, and minerals. Eggplants are known to aid digestion and promote heart health.

Aloo Palak: Aloo Palak is a nutritional powerhouse, combining the benefits of spinach and potatoes. Spinach is abundant in iron, while potatoes provide a good dose of potassium.

Culinary Versatility

Aloo Baingan: Despite its traditional roots, Aloo Baingan can be adapted to suit various dietary preferences. Vegans can enjoy it without cream, and those who prefer a milder taste can adjust the spice levels.

Aloo Palak: The versatility of Aloo Palak lies in its ability to complement different proteins. You can pair it with paneer (cottage cheese), tofu, or chickpeas to add a protein punch.

alloo baingan

Variations of Aloo Baingan and Aloo Palak

Both Aloo Baingan and Aloo Palak have regional and individual variations that add unique twists to the classic recipes.

Aloo Baingan Variations

  1. Hyderabadi Bagara Baingan: Eggplant cooked in a nutty and flavorful sesame-peanut gravy.
  2. Bharwan Baingan: Eggplants stuffed with a spicy masala filling and pan-fried to perfection.
  3. Kashmiri Dum Aloo: Aloo Baingan with a Kashmiri twist, cooked in a rich and creamy yogurt-based gravy.

Aloo Palak Variations

  1. Palak Paneer: A popular variation where spinach is paired with soft paneer (cottage cheese) cubes.
  2. Aloo Palak Saag: A rustic version of the dish, prepared with mustard greens and spinach.
  3. Palak Aloo Tikki: Pan-fried potato and spinach patties, served with chutney.

Troubleshooting Common Issues

Encountering problems while preparing these dishes? Have a look onto some troubleshooting tips to help you out:

  1. Soggy Eggplants or Potatoes: Ensure that you don’t overcrowd the pan while frying or cooking the vegetables. Fry or cook them in batches to achieve a crispy texture.
  2. Bitter Eggplants: To reduce the bitterness of eggplants, sprinkle some salt on the diced eggplants and let them sit for about 10 minutes. Rinse off the salt before using them in the recipe.
  3. Overcooking Spinach: Be careful not to overcook the spinach, as it can lose its vibrant green color and become mushy. Cook it until it just wilts down.
  4. Curry too Spicy: If the curry turns out too spicy, add a splash of yogurt or cream to mellow down the heat.
  5. Curry too Mild: Increase the amount of spices or add a pinch of red chili powder for a bolder flavor.
  6. Runny Curry: If the curry is too runny, remove the lid and let it simmer on low heat to thicken the sauce.
Aloo Baingan and Aloo Palak

Nutritional Value

Here’s a comparison of the nutritional value per 100g serving of Aloo Baingan and Aloo Palak:

NutrientAloo Baingan (per 100g)Aloo Palak (per 100g)
Calories90 kcal80 kcal
Carbohydrates15.2g14.1g
Protein1.9g2.6g
Total Fat3.6g2.3g
Saturated Fat0.5g0.7g
Fiber3.1g2.9g
Vitamin A4% DV34% DV
Vitamin C5% DV12% DV
Vitamin K6% DV53% DV
Vitamin B615% DV10% DV
Folate5% DV8% DV
Iron3% DV5% DV
Potassium8% DV7% DV
Magnesium5% DV6% DV
Calcium1% DV8% DV

Please note that the nutritional values mentioned above are approximate and can vary based on the specific ingredients used in the recipes. It’s always a good idea to refer to the nutrition labels on individual products for precise information.

FAQs (Frequently Asked Questions)

Q: Can I use frozen spinach for Aloo Palak? A: Yes, you can use frozen spinach for convenience. Thaw the spinach before adding it to the curry.

Q: Can I make these dishes vegan-friendly? A: Absolutely! For Aloo Baingan, omit the cream, and for Aloo Palak, use plant-based cream or coconut milk instead of dairy cream.

Q: Can I substitute eggplant with another vegetable in Aloo Baingan? A: Sure! While the traditional recipe calls for eggplant, you can use zucchini or bell peppers for a delicious twist.

Q: Is it necessary to fry the eggplant in Aloo Baingan? A: Frying the eggplant adds a nice texture and flavor to the dish, but if you prefer a healthier version, you can roast the eggplant in the oven.

Q: Can I add other vegetables to Aloo Palak? A: Certainly! You can add carrots, peas, or corn to make the curry even more nutritious and colorful.

Q: Can I freeze the leftovers of these dishes? A: Yes, both Aloo Baingan and Aloo Palak can be frozen. Allow the curries to cool down completely before transferring them to airtight containers and freezing them for up to 2-3 months.

Conclusion

In the battle of Aloo Baingan vs. Aloo Palak, both dishes shine in their own unique ways. Aloo Baingan mesmerizes with its earthy flavors, while Aloo Palak captivates with its vibrant green goodness. Whether you’re a spice enthusiast or crave a mild treat, these dishes offer something for everyone. Explore their variations, experiment with different ingredients, and savor the goodness of Indian cuisine right in your kitchen.

So, next time you’re planning a delightful meal, let Aloo Baingan and Aloo Palak take center stage, and relish the magic they bring to your plate.

Aloo Baingan and Aloo Palak/Aloo Baingan and Aloo Palak/Aloo Baingan and Aloo Palak/Aloo Baingan and Aloo Palak/Aloo Baingan and Aloo Palak/Aloo Baingan and Aloo Palak/Aloo Baingan and Aloo Palak/Aloo Baingan and Aloo Palak/Aloo Baingan and Aloo Palak/Aloo Baingan and Aloo Palak/Aloo Baingan and Aloo Palak/Aloo Baingan and Aloo Palak

VersaBlog: Exploring Health, Fitness, Finance, and More
Chicken Bhuna Recipe: A Spicy Delight with Variations

Introduction

Are you craving a dish that combines the fiery flavors of spices with tender chicken? Look no further than Chicken Bhuna! This popular Indian recipe is a true culinary delight that tantalizes your taste buds with its rich, aromatic gravy and perfectly cooked chicken. In this article, we will take you on a gastronomic journey through the world of Chicken Bhuna, from the classic recipe to exciting variations that will spice up your dining experience.

Chicken Bhuna: A Flavorsome Dish

Chicken Bhuna is a classic Indian dish known for its bold and robust flavors. It originates from the Indian subcontinent and has gained popularity worldwide for its irresistible taste. The term “bhuna” refers to the process of slow-cooking spices and meat together, allowing the flavors to meld and intensify.

What makes Chicken Bhuna special?

Chicken Bhuna stands out from other chicken curries due to its unique cooking technique and distinctive blend of spices. The dish is traditionally prepared by marinating chicken pieces in a mixture of yogurt, ginger, garlic, and a medley of aromatic spices. The marinated chicken is then slowly cooked in a thick and luscious gravy made with onions, tomatoes, and a variety of spices. The slow cooking process allows the flavors to develop and infuse into the tender chicken, resulting in a mouthwatering dish that is both spicy and savory.

"Image: Chicken Bhuna variations - Spicy Chicken Bhuna, Creamy Cashew Chicken Bhuna, Coconut Chicken Bhuna, Lemon Pepper Chicken Bhuna, and Smoky Tandoori Chicken Bhuna."

Ingredients for Chicken Bhuna

To prepare a delicious Chicken Bhuna, you will need the following ingredients:

  • Chicken pieces (bone-in or boneless)
  • Yogurt
  • Onions
  • Tomatoes
  • Ginger
  • Garlic
  • Green chilies
  • Red chili powder
  • Turmeric powder
  • Cumin powder
  • Coriander powder
  • Garam masala
  • Fresh coriander leaves
  • Oil or ghee (clarified butter)
  • Salt

Now that we have covered the basics, let’s dive into the step-by-step process of making Chicken Bhuna.

Chicken Bhuna Recipe: Step-by-Step Guide

Step 1: Marinating the Chicken

  1. In a mixing bowl, combine yogurt, ginger-garlic paste, red chili powder, turmeric powder, cumin powder, coriander powder, and salt.
  2. Incorporate the succulent chicken pieces into the flavorful marinade, ensuring each piece is thoroughly coated for an even distribution of deliciousness.
  3. Cover the bowl and let the chicken marinate in the refrigerator for at least 1 hour, allowing the flavors to penetrate the meat.

Step 2: Cooking the Chicken

  1. Heat oil or ghee in a deep pan or skillet over medium heat.
  2. Introduce finely diced onions into the mix and expertly sauté them until they acquire a delectable golden brown hue.
  3. Stir in the marinated chicken and cook until it turns brown and the spices release their aroma.
  4. Add chopped tomatoes, green chilies, and a pinch of salt. Cook until the tomatoes soften and blend with the other ingredients.
  5. Reduce the heat to low and cover the pan. Let the chicken simmer for about 15-20 minutes, or until it is fully cooked and tender.
  6. .Ensure to give the chicken an occasional stir to prevent it from adhering to the bottom of the pan, guaranteeing an evenly cooked and delightful dish. Finally, generously sprinkle the aromatic garam masala over the chicken, and adorn it with a vibrant garnish of freshly chopped coriander leaves for an enticing presentation.

Step 3: Serving Chicken Bhuna

  1. Transfer the Chicken Bhuna to a serving dish.
  2. Garnish with additional fresh coriander leaves for an extra burst of flavor.
  3. Serve hot with naan bread, rice, or roti for a complete and satisfying meal.
"Image: Chicken Bhuna variations - Spicy Chicken Bhuna, Creamy Cashew Chicken Bhuna, Coconut Chicken Bhuna, Lemon Pepper Chicken Bhuna, and Smoky Tandoori Chicken Bhuna."

Variations of Chicken Bhuna

While the classic Chicken Bhuna recipe is a delight in itself, there are numerous variations that allow you to add your personal touch and experiment with different flavors.

Here are a handful of captivating variations to explore:

1. Spicy Chicken Bhuna

For those who enjoy an extra kick of heat, the Spicy Chicken Bhuna variation is perfect. Increase the amount of red chili powder or add a few chopped green chilies to the recipe for a fiery and bold flavor profile.

2. Creamy Cashew Chicken Bhuna

If you prefer a milder and creamier version of Chicken Bhuna, try the Creamy Cashew variation. Replace some of the tomatoes with cashew paste and add a splash of heavy cream for a rich and indulgent twist.

3. Coconut Chicken Bhuna

For a tropical twist, the Coconut Chicken Bhuna variation is a must-try. Incorporate coconut milk into the gravy and garnish with toasted coconut flakes to infuse the dish with a subtle sweetness.

4. Lemon Pepper Chicken Bhuna

Add a tangy and zesty flavor to your Chicken Bhuna with the Lemon Pepper variation. Squeeze fresh lemon juice over the cooked chicken and sprinkle it with freshly ground black pepper for a refreshing and aromatic twist.

"Image: Marinating chicken for Chicken Bhuna - Tender chicken pieces coated in a yogurt-based marinade with aromatic spices."

5. Smoky Tandoori Chicken Bhuna

For a smoky and charred flavor, prepare the Tandoori Chicken Bhuna variation. Marinate the chicken in a mixture of tandoori spices, yogurt, and lemon juice before cooking it in the bhuna style. The result is a tantalizing dish with a smoky aroma and a vibrant red color.

FAQs about Chicken Bhuna

Q: What is the best cut of chicken to use for Chicken Bhuna?

A: Chicken thighs or bone-in chicken pieces work best for Chicken Bhuna as they retain moisture and become tender during the slow cooking process.

Q: Can I make Chicken Bhuna in advance?

A: Yes, you can prepare Chicken Bhuna in advance and reheat it before serving. In fact, the flavors tend to develop further when the dish is left to sit for a few hours or overnight.

Q: Is Chicken Bhuna a spicy dish?

A: Chicken Bhuna is known for its spiciness, but the level of heat can be adjusted according to personal preference.

If you desire a less fiery rendition, feel free to decrease the quantity of red chili powder or completely exclude the green chilies for a milder flavor profile.

Q: Can I substitute yogurt in the marinade?

A: Yes, if you are lactose intolerant or prefer a dairy-free option, you can substitute yogurt with coconut milk or a dairy-free yogurt alternative.

Q: Can I freeze Chicken Bhuna?

A: Yes, you can freeze Chicken Bhuna for later use. Allow the dish to cool completely before transferring it to an airtight container and freezing.

You can safely store the Chicken Bhuna for a period of up to three months, retaining its flavors and quality.

Q: What are some side dishes that go well with Chicken Bhuna?

A: Chicken Bhuna pairs well with naan bread, rice, roti, or even a fresh salad. You can also serve it alongside raita (yogurt sauce) and pickles for a complete Indian meal experience.

"Image: Plate of Chicken Bhuna - A mouthwatering dish of Chicken Bhuna served with garnishes, accompanied by naan bread and rice."

Conclusion

Chicken Bhuna is a culinary masterpiece that brings together the bold flavors of spices and succulent chicken. With its aromatic gravy and rich taste, it has become a favorite among food enthusiasts worldwide. Whether you stick to the classic recipe or explore the exciting variations, Chicken Bhuna is sure to delight your taste buds and leave you craving for more. So, gather your ingredients, unleash your culinary creativity, and savor the spicy delight of Chicken Bhuna!

VersaBlog: Exploring Health, Fitness, Finance, and More
Fish Fry Made Easy: Expert Tips and Tricks

Dive into the world of mouthwatering Fish Fry recipes, exploring various variations, preparation time, and nutritional value. Learn how to prepare this flavorful dish and enjoy the goodness of crispy fried fish.

Introduction: Embracing the Flavorful Delight of Fish Fry

If you’re a seafood lover, nothing beats the irresistible taste of a well-prepared Fish Fry. This delectable dish combines the goodness of fresh fish with a crispy coating, creating a harmonious blend of flavors and textures. Whether you’re a seasoned chef or a culinary novice, our comprehensive guide to Fish Fry recipes, variations, preparation time, and nutritional value will surely whet your appetite.

Fish Fry: An All-Time Favorite

Fish Fry is a beloved dish that can be found in various cuisines around the world. From the Southern United States to coastal regions in India, this delightful recipe has made its mark on the culinary map. The dish typically consists of seasoned fish coated with a mixture of flour or breadcrumbs and then deep-fried until golden brown and crispy. The result is a succulent and flavorful treat that leaves taste buds longing for more.

The Perfect Fish for Frying

Q: Can you tell me What type of fish is best for frying?

While there are many fish varieties you can use for frying, certain types work exceptionally well due to their firm texture and mild flavor. Some popular choices include:

"Fresh fish fillets arranged on a clean cutting board, ready to be coated in a flavorful mixture of flour, spices, and breadcrumbs."
  • Cod: A mild-flavored fish with a firm texture, ideal for frying.
  • Tilapia: Delicate and versatile, perfect for absorbing flavors.
  • Catfish: Known for its slightly sweet taste and firm texture.
  • Haddock: Offers a sweet and subtle flavor when fried.

It’s essential to select fresh fish for the best results. Head to your local fish market to ensure you’re using the finest catch available.

Classic Fish Fry Recipe

Q: What are the essential ingredients for a classic Fish Fry?

A: To prepare a classic Fish Fry, you’ll need:

  • Fresh fish fillets
  • All-purpose flour
  • Cornmeal or breadcrumbs
  • Eggs
  • Milk or buttermilk
  • Salt
  • Black pepper
  • Paprika
  • Garlic powder
  • Onion powder
  • Cayenne pepper (optional for added spice)

Now, let’s dive into the step-by-step preparation process:

Step 1: Prepare the Fish

  1. First rinse the fish fillets using cold water and let them dryor wipe them
  2. Cut the fillets into manageable pieces, ensuring they are of similar thickness for even cooking.

Step 2: Create the Dredge Mixture

  1. In a shallow dish, combine the all-purpose flour, cornmeal or breadcrumbs, salt, black pepper, paprika, garlic powder, and onion powder.
  2. For a spicy kick, add a pinch of cayenne pepper to the mixture.

Step 3: Beat the Eggs

  1. In a separate bowl, beat the eggs with milk or buttermilk until well-combined.

Step 4: Coat the Fish

  1. Dip each fish fillet into the egg mixture, ensuring it’s fully coated.
  2. Transfer the coated fillet to the dredge mixture and press gently to adhere the coating to the fish.

Step 5: Fry to Perfection

  1. Heat vegetable oil or frying oil in a deep skillet or fryer to 350°F (175°C).
  2. Carefully place the coated fish fillets into the hot oil and fry until they turn golden brown and crispy on both sides.
  3. Once cooked, remove the fish from the oil and drain excess oil on a paper towel.

Serve your classic Fish Fry hot and crispy, accompanied by your favorite sides and tartar sauce for an unforgettable dining experience.

"A collage of mouthwatering fish fry variations, including Cajun, coconut crusted, Indian spiced, lemon and herb, and beer-battered, each showcasing unique flavors and textures."

Variations of Fish Fry Recipes

Fish Fry is a versatile dish that can be prepared in various ways to suit different palates. Let’s explore some delightful variations:

1. Spicy Cajun Fish Fry

Add a spicy twist to your Fish Fry by incorporating Cajun seasoning into the dredge mixture. The bold flavors of Cajun spices will elevate your dish and leave your taste buds tingling with delight.

2. Lemon and Herb Fish Fry

Infuse your fish with the refreshing taste of lemon and a medley of aromatic herbs like thyme, rosemary, and parsley. This variation adds a burst of freshness to the traditional Fish Fry.

3. Coconut Crusted Fish Fry

Transport your taste buds to a tropical paradise with a coconut crusted Fish Fry. Dredge the fish fillets in a mixture of shredded coconut and panko breadcrumbs for a delightful crunch and a hint of sweetness.

4. Indian Spiced Fish Fry

Experience the flavors of India with a blend of traditional Indian spices like cumin, coriander, turmeric, and chili powder. This aromatic Fish Fry will surely be a hit among spice enthusiasts.

5. Beer-Battered Fish Fry

For a light and airy coating, try a beer-battered Fish Fry. The carbonation in the beer creates a fluffy texture, resulting in an irresistible crispy finish.

Preparing the Fish Fry: Tips and Techniques

Q: How can I ensure my Fish Fry turns out perfect every time?

A: Follow these tips and techniques to master the art of preparing a flawless Fish Fry:

  1. Maintain the Right Oil Temperature: Use a cooking thermometer to ensure the oil stays at the recommended temperature of 350°F (175°C). This prevents the fish from becoming greasy and guarantees a crispy exterior.
  2. Pat Dry the Fish: Excess moisture on the fish can lead to uneven frying and a soggy coating. Make sure to pat the fish fillets dry with paper towels before dredging them.
  3. Avoid Overcrowding: Fry the fish in batches to prevent overcrowding in the skillet. This ensures even cooking and allows the fish to retain its crispy texture.
  4. Use Fresh Oil: Regularly replace the frying oil to maintain the best flavor and avoid any off-putting odors.
  5. Experiment with Marinades: For added depth of flavor, marinate the fish fillets in your favorite seasonings and refrigerate them for a few hours before frying.

By following these simple yet effective techniques, you can achieve a Fish Fry that will rival even the best seafood restaurants.

Nutritional Value of Fish Fry

Fish Fry offers a delectable taste while also providing essential nutrients. Here’s a breakdown of its nutritional value:

  • Protein: Fish is an excellent source of high-quality protein, essential for muscle repair and growth.
  • Omega-3 Fatty Acids: Many fish varieties are rich in omega-3 fatty acids, which promote heart health and reduce inflammation.
  • Vitamin D: Fish is one of the few natural sources of vitamin D, vital for bone health and immune function.
  • Selenium: This trace mineral found in fish acts as an antioxidant, protecting cells from damage.

However, it’s important to enjoy Fish Fry in moderation as it is deep-fried and may contain additional calories from the coating.

"A delectable Fish Fry served on a white plate, accompanied by a side of coleslaw, hush puppies, and a wedge of lemon, creating a scrumptious seafood feast."

FAQs about Fish Fry

  1. Q: Can I use frozen fish for a Fish Fry? A: Yes, you can use frozen fish, but make sure to thaw it completely and pat it dry before frying to prevent excess moisture.
  2. Q: Can I use gluten-free flour for coating? A: Absolutely! You can use gluten-free flour or alternative coatings like almond flour or chickpea flour for a gluten-free version.
  3. Q: Can I air-fry the fish instead of deep-frying? A: Yes, air-frying is a healthier alternative to deep-frying and produces equally crispy results.
  4. Q: What sides go well with Fish Fry? A: Fish Fry pairs well with coleslaw, hush puppies, French fries, and a squeeze of lemon.
  5. Q: How long can I store leftover Fish Fry? A: Leftover Fish Fry can be refrigerated for up to 2 days.
  6. Q: Can I use a different type of fish for the variations? A: Absolutely! Feel free to use your favorite fish or the freshest catch available for the variations.

Conclusion: Dive into a Flavorful Journey

Fish Fry is a culinary delight that showcases the art of creating a crispy and succulent seafood dish. With its endless variations and delightful flavors, it has become a favorite among seafood enthusiasts worldwide. By following our expert tips and trying out the creative variations, you’ll be able to master the art of preparing the perfect Fish Fry in your own kitchen.

So, don your apron, grab the freshest catch, and embark on a flavorful journey that will leave you and your guests craving more. Whether you prefer the classic recipe or venture into exciting variations, Fish Fry is sure to satisfy your cravings for a delectable seafood feast.

VersaBlog: Exploring Health, Fitness, Finance, and More
Savoring Tradition: Aloo Matar and its Timeless Appeal

Introduction:

Aloo matar is a classic North Indian dish that combines the goodness of potatoes and green peas in a rich and flavorful gravy. This vegetarian delicacy is loved by people of all ages and is often served with roti (Indian bread) or rice. In this article, we will explore the origins of aloo matar, its nutritional benefits, and provide you with a detailed recipe to recreate this delectable dish in your own kitchen.

1. Aloo Matar: An Introduction

Aloo matar, also known as “potato and peas curry,” is a popular vegetarian dish hailing from the Indian subcontinent. It is a flavorful and comforting dish that is loved by both children and adults alike. The combination of soft potatoes and sweet green peas cooked in a spiced tomato-based gravy creates a delightful culinary experience.

2. The Origins of Aloo Matar

The exact origins of aloo matar are unclear, but it is believed to have originated in the northern regions of India. This region is known for its rich culinary heritage, and aloo matar is a testament to the flavorful and diverse dishes found in this part of the country. Over time, aloo matar has become a staple in Indian households and is often prepared during festivals, special occasions, or as an everyday meal.

Alt Text: Fresh potatoes, green peas, onions, tomatoes, and a variety of spices neatly arranged on a kitchen countertop, ready to be used for making Aloo Matar.

3. Nutritional Benefits of Aloo Matar

Aloo matar not only tantalizes the taste buds but also provides several nutritional benefits. Potatoes are a good source of carbohydrates, dietary fiber, and vitamin C. Green peas, on the other hand, are packed with essential nutrients like vitamins A, C, and K, as well as iron and dietary fiber. When combined, these ingredients create a dish that is not only delicious but also nutritious.

4. Aloo Matar Recipe: Ingredients and Preparation

To make aloo matar, you will need the following ingredients:

  • 3 medium-sized potatoes, peeled and cubed
  • 1 cup green peas
  • 2 medium-sized onions, finely chopped
  • 2 tomatoes, pureed
  • 2 green chilies, slit lengthwise
  • 1 tablespoon ginger-garlic paste
  • 1 teaspoon cumin seeds
  • 1 teaspoon turmeric powder
  • 1 teaspoon red chili powder
  • 1 teaspoon garam masala
  • 1/2 teaspoon cumin powder
  • 1/2 teaspoon coriander powder
  • Salt to taste
  • Fresh coriander leaves for garnishing
  • 3 tablespoons oil or ghee (clarified butter)

5. Step-by-Step Guide to Cooking Aloo Matar

Follow these simple steps to prepare delicious aloo matar at home:

Step 1: Heat a generous amount of oil or ghee in a sturdy pan and sprinkle in the aromatic cumin seeds, letting them sizzle and dance in the hot pan until they release their fragrant essence.

Step 2: Add chopped onions and sauté until golden brown.

Alt Text: A series of images showcasing the step-by-step process of cooking Aloo Matar, from sautéing onions and spices to adding potatoes and peas in a flavorful gravy.

Step 3: Introduce the delightful combination of freshly prepared ginger-garlic paste and slender green chilies to the pan, allowing them to mingle and infuse their tantalizing flavors through a gentle sautéing process for a minute.

Step 4: Add tomato puree and cook until the oil separates from the mixture.

Step 5: Add turmeric powder, red chili powder, cumin powder, coriander powder, and salt. Mix well.

Step 6: Gently incorporate the diced potatoes and vibrant green peas into the pan, ensuring they are thoroughly coated with the aromatic spice blend, creating a harmonious marriage of flavors and textures.

Step 7: Cover the pan and cook on medium heat until the potatoes and peas are tender.

Step 8: Once the vegetables are cooked, sprinkle garam masala and mix gently.

Step 9: Garnish with fresh coriander leaves.

Step 10: Serve hot with roti, naan, or rice.

Alt Text: Aloo Matar served in a bowl, garnished with fresh coriander leaves, radiating warmth and inviting aromas.

6. Variations of Aloo Matar

While the traditional aloo matar recipe is delightful on its own, there are several variations that you can try to add a unique twist to this classic dish. Some popular variations include:

  • Aloo Matar Paneer: Adding paneer (Indian cottage cheese) to aloo matar enhances its richness and provides an extra layer of flavor.
  • Aloo Matar Gobi: This variation includes cauliflower along with potatoes and peas, adding a delightful texture and taste to the dish.
  • Aloo Matar Pulao: Transform aloo matar into a one-pot meal by combining it with fragrant basmati rice to create a flavorful and aromatic pulao.

7. Tips and Tricks for Making Perfect Aloo Matar

Here are some tips and tricks to elevate your aloo matar cooking skills:

  • Choose firm potatoes that hold their shape after cooking.
  • If using frozen peas, thaw them before adding to the dish.
  • Feel free to adjust the intensity of the spices to your liking, tailoring the flavors to suit your personal taste and preference.
  • For a creamier texture, you can add a tablespoon of fresh cream or yogurt.
  • Garnish with fresh coriander leaves to enhance the visual appeal and taste.

Frequently Asked Questions (FAQs) about Aloo Matar:

Q: Can I use canned peas instead of fresh peas? A: While fresh peas are recommended for the best taste and texture, you can use canned peas as a substitute if fresh peas are not available.

Before incorporating the canned peas into the dish, make sure to drain and rinse them to remove any excess liquid or brine, ensuring a clean and pure taste in the final preparation.

Q: Can I make aloo matar in advance? A: Yes, you can prepare aloo matar in advance and refrigerate it.

When it comes to reheating the leftover aloo matar, take care to warm it gently either on the stovetop or in the microwave. To prevent the dish from drying out, consider adding a small amount of water or vegetable broth, ensuring that the flavors remain vibrant and the texture remains moist and enjoyable.

Q: Is aloo matar a vegan dish? A: The traditional recipe for aloo matar is vegetarian, but it can easily be made vegan by replacing ghee (clarified butter) with oil.

Q: Can I add other vegetables to aloo matar? A: Yes, you can experiment with adding other vegetables like carrots, bell peppers, or mushrooms to aloo matar to create your own unique version of the dish.

Alt Text: Different variations of Aloo Matar, including Aloo Matar Paneer, Aloo Matar Gobi, and Aloo Matar Pulao, each showcasing unique combinations of ingredients and flavors.

To ensure that all the vegetables in the aloo matar are perfectly cooked, be mindful of adjusting the cooking time accordingly. This will guarantee that each component reaches its desired level of tenderness, resulting in a harmonious blend of flavors and textures in the final dish.

Q: What are some popular accompaniments for aloo matar? A: Aloo matar pairs well with various Indian bread like roti, naan, or paratha. It can also be served with steamed rice or jeera rice (cumin rice) for a complete meal.

Q: How long can I store leftover aloo matar? A: Leftover aloo matar can be stored in an airtight container in the refrigerator for up to 3-4 days.

Prior to consumption, it is important to ensure that the aloo matar is reheated thoroughly. This step ensures that the dish is heated evenly, allowing the flavors to meld together and ensuring a delightful culinary experience.

Conclusion

Aloo matar is a truly delightful and nourishing dish that beautifully captures the vibrant flavors of Indian cuisine. Whether you have a penchant for fiery curries or prefer milder undertones, aloo matar can be customized to perfectly suit your taste preferences. With the help of our comprehensive step-by-step guide, you can effortlessly recreate this timeless culinary masterpiece right in the comfort of your own kitchen. Prepare to dazzle your loved ones with your culinary prowess as you embark on a flavorsome journey with aloo matar. So don’t hesitate, gather the necessary ingredients, and let the aromatic magic unfold!