Deprecated: Creation of dynamic property Storely_Customizer_Notify::$config is deprecated in /home/w4405701/public_html/wp-content/themes/storely/inc/customizer/customizer-notify.php on line 36
VersaBlog: Exploring Health, Fitness, Finance, and More Archives - Page 2 of 11 - Sellercart
VersaBlog: Exploring Health, Fitness, Finance, and More
Chicken Kofta Delight: Exploring Nutritious Variations, Troubleshooting Tips, and a Delectable Recipe

Explore the nutritional benefits of chicken kofta while discovering various delectable variations, troubleshooting tips, and a delicious recipe. Get answers to common FAQs and more in this comprehensive article.

Introduction

When it comes to flavorful and nutritious dishes, chicken kofta takes center stage. This article will not only tantalize your taste buds with a scrumptious kofta recipe but also delve into the nutritional value of this delectable delicacy. From exploring exciting variations to troubleshooting any challenges you may encounter during preparation, we’ve got you covered.

An artfully arranged plate of perfectly cooked chicken kofta

Nutritional Value of Chicken Kofta

Chicken kofta is more than just a culinary delight; it’s also a nutritional powerhouse.

NutrientAmount per 100g
Calories190 kcal
Protein17.5g
Total Fat11.8g
Saturated Fat2.8g
Cholesterol63mg
Carbohydrates2.1g
Fiber0.3g
Sugars0.6g
Sodium370mg
Vitamin A91 IU
Vitamin C1.4mg
Calcium25mg
Iron1.1mg

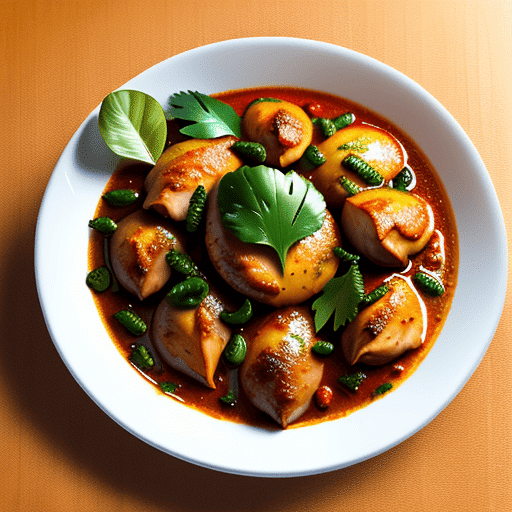
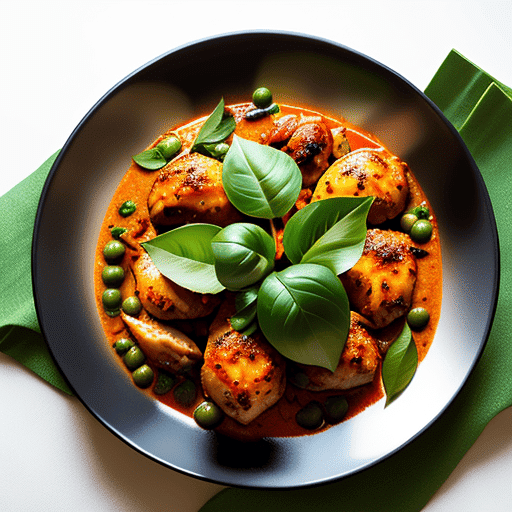
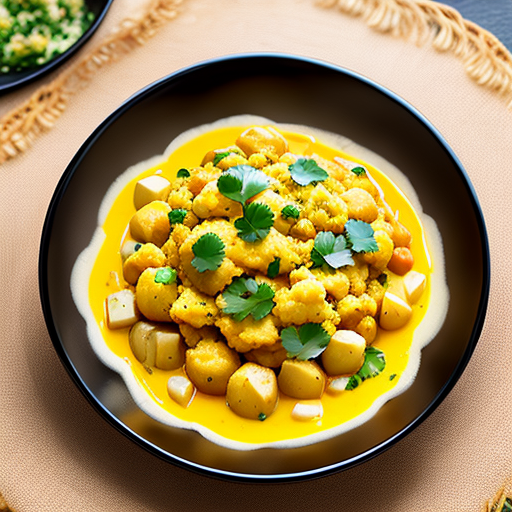
Exploring Delectable Variations of Chicken Kofta

Diversity is the essence of culinary excellence, and chicken kofta offers an array of tantalizing variations. Let’s explore some creative renditions of this delightful dish:

1. Healthy Spinach and Chicken Kofta

Add a nutritious twist to the classic kofta by incorporating finely chopped spinach into the chicken mixture. This not only enhances the flavor but also boosts the iron and vitamin content, making it a wholesome option for health-conscious foodies.

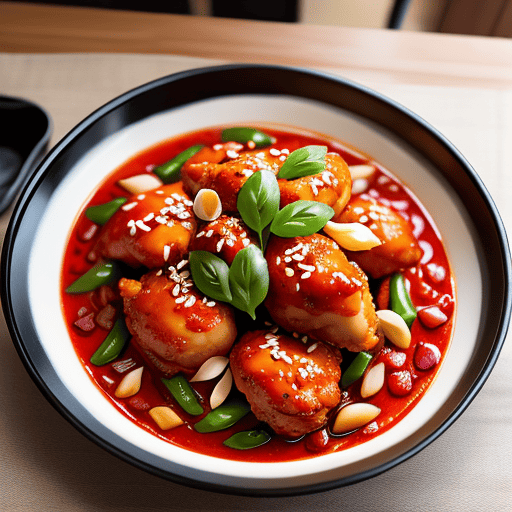
2. Tandoori Chicken Kofta

Infuse your kofta with the smoky flavors of tandoori spices by marinating the chicken mixture in a tandoori spice blend before shaping and cooking. Grilling or roasting these koftas adds a delightful charred taste.

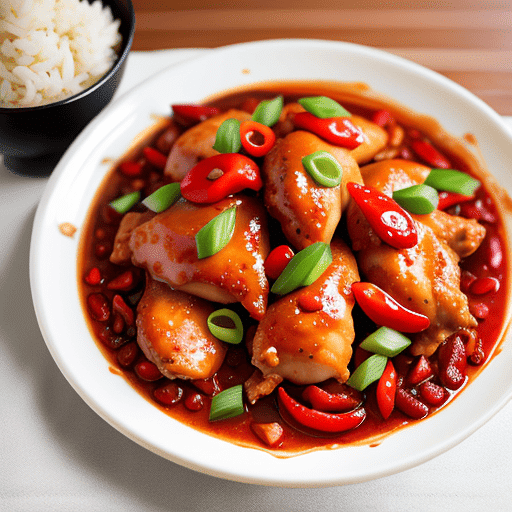
3. Zesty Lemon Chicken Kofta

For a burst of freshness, add lemon zest and a squeeze of lemon juice to the chicken mixture. The zesty flavors perfectly complement the savory kofta and elevate the dish to new heights.

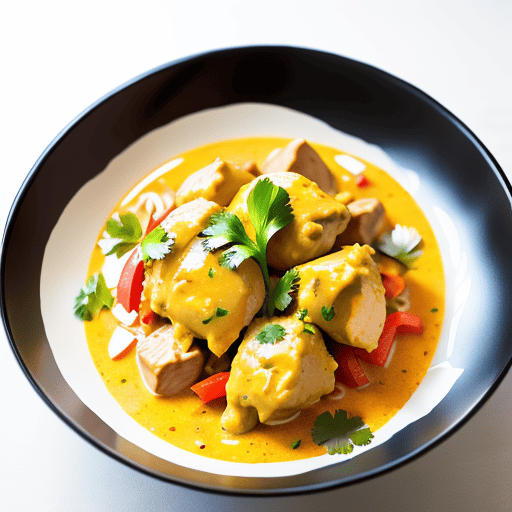
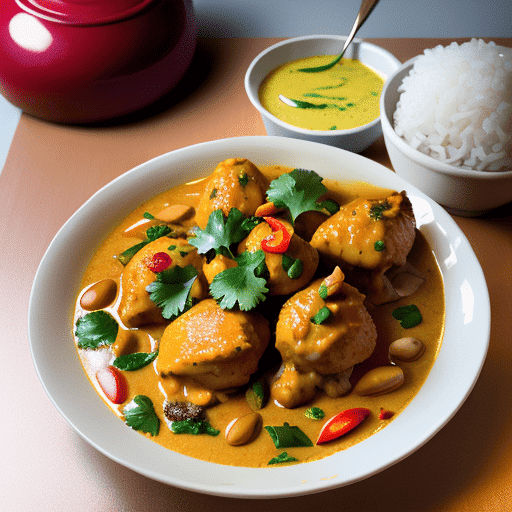
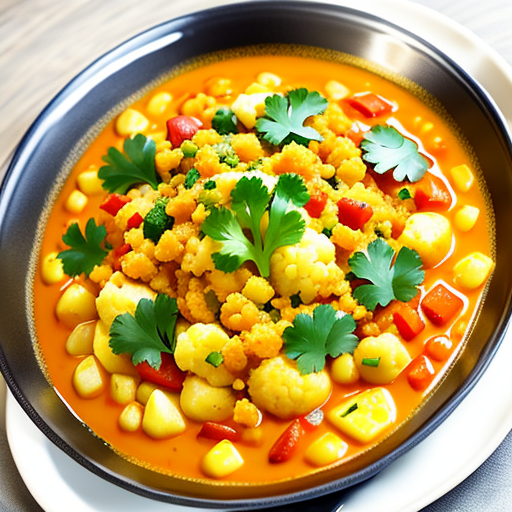
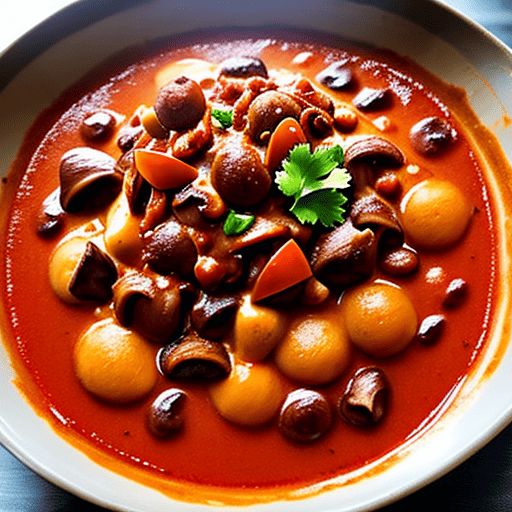
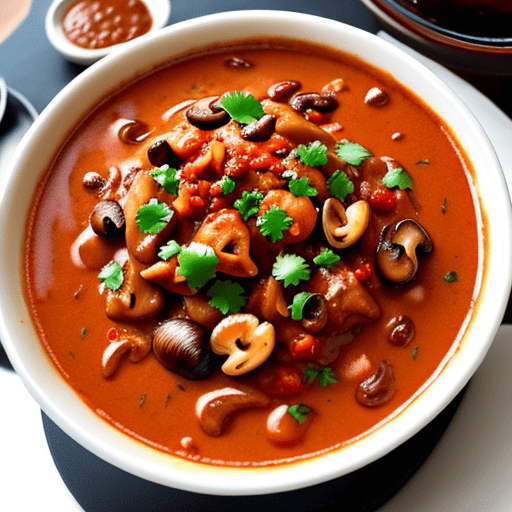
4. Coconut Curry Chicken Kofta

Incorporate coconut milk into the sauce to create a luscious and creamy coconut curry chicken kofta. The tropical flavors infuse the kofta with a hint of sweetness, balancing the spices beautifully.

 A selection of aromatic spices used in kofta preparation.

Troubleshooting Tips for Perfect Chicken Kofta

As with any culinary adventure, challenges may arise. Here are some troubleshooting tips to ensure your chicken kofta turn out perfectly:

1. Kofta Falling Apart

If your kofta is falling apart while cooking, the mixture may be too wet. Add a little more breadcrumbs or a binding agent like egg to improve the texture and hold the kofta together.

2. Dry Kofta

Should your kofta turn out dry, consider marinating the chicken for a longer duration before shaping. Additionally, avoid overcooking, as it can result in a drier texture.

3. Lack of Flavor

If you find your kofta lacking flavor, try adjusting the spice blend to suit your taste preferences. Experiment with various spices until you find the perfect combination.

4. Sauce Separating

If your sauce appears to be separating, ensure the heat is on medium-low and stir continuously. Adding a tablespoon of yogurt or cream can help stabilize the sauce.

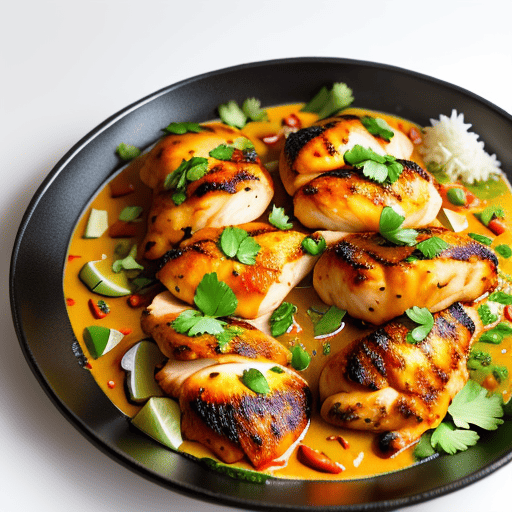
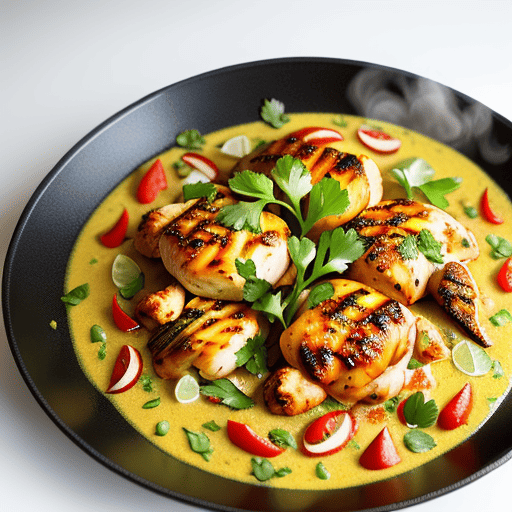
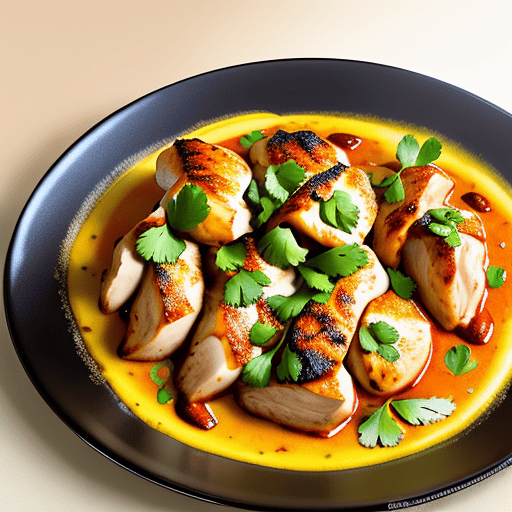
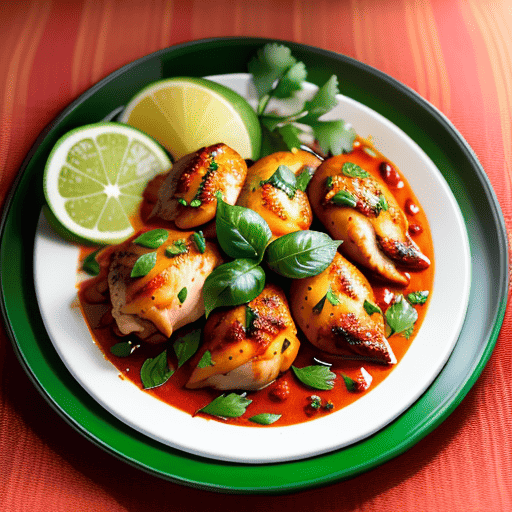
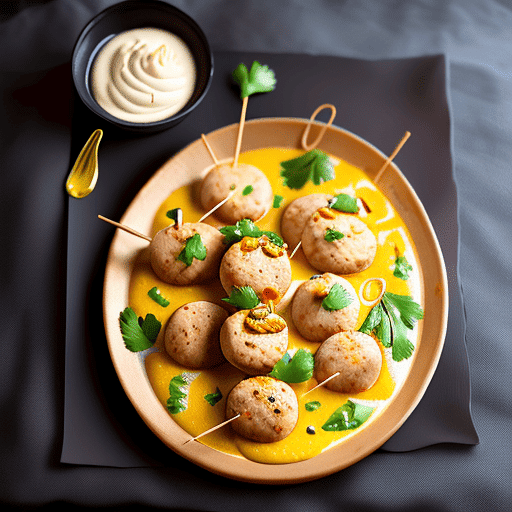
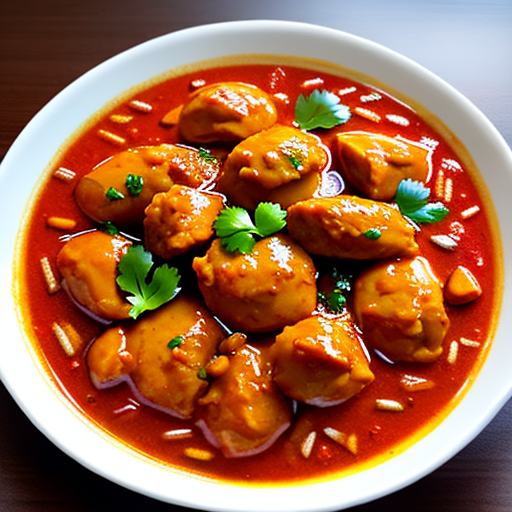
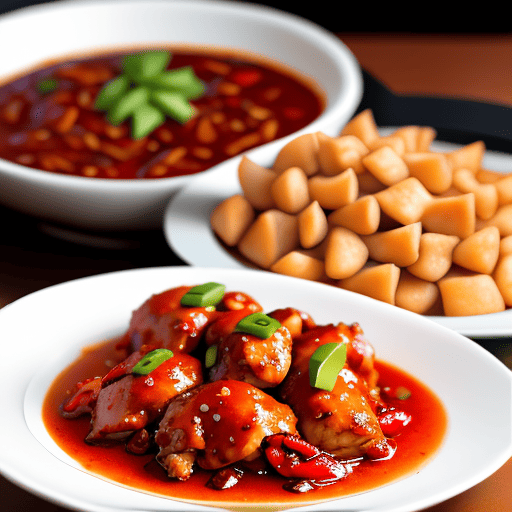
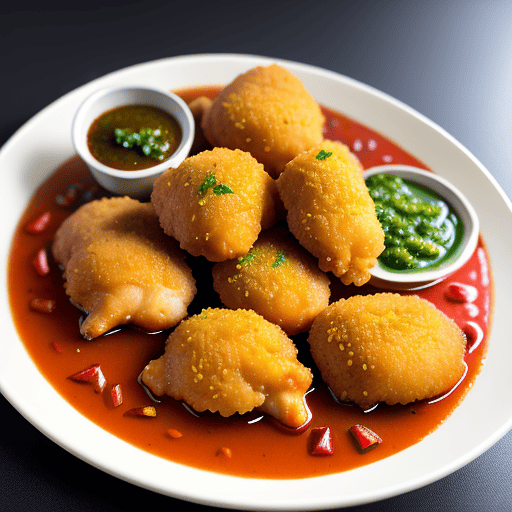
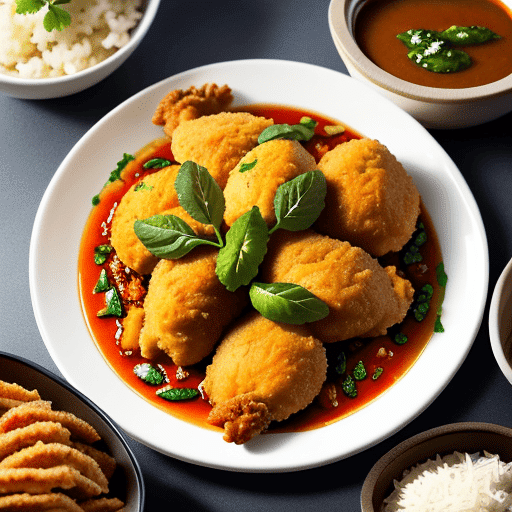
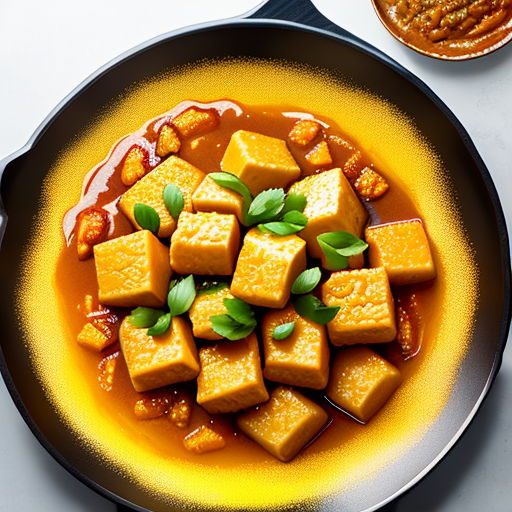
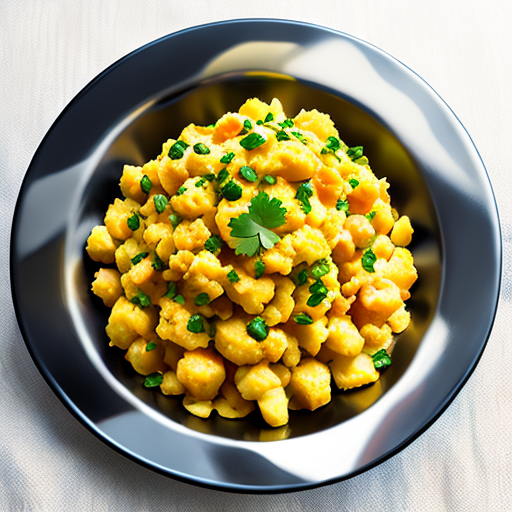
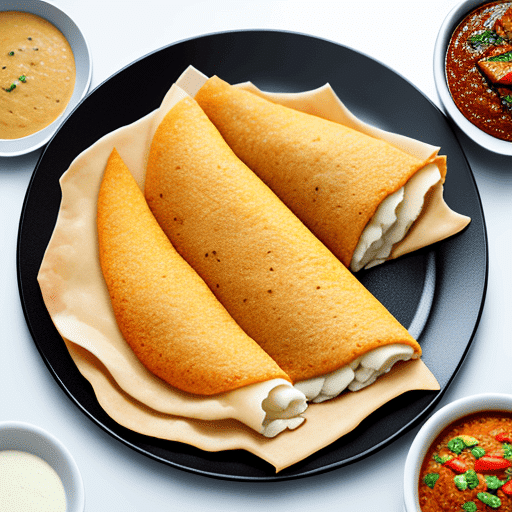
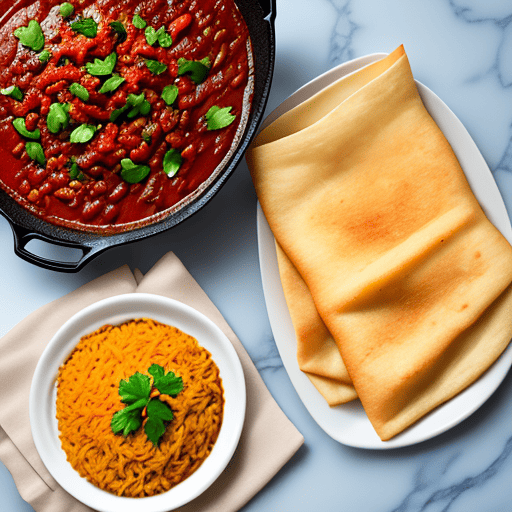
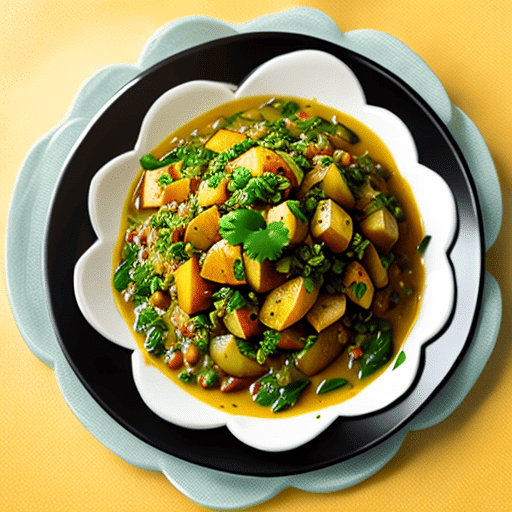
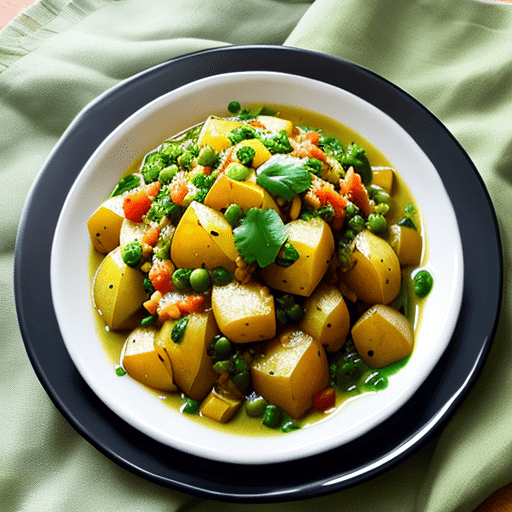
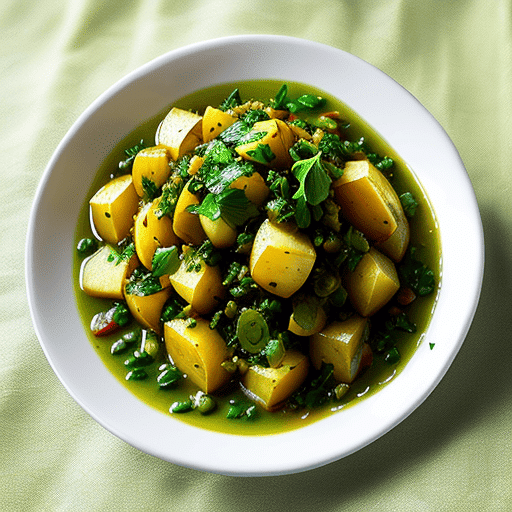
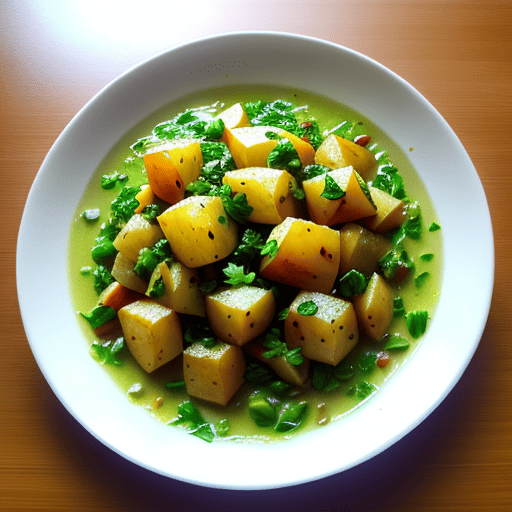
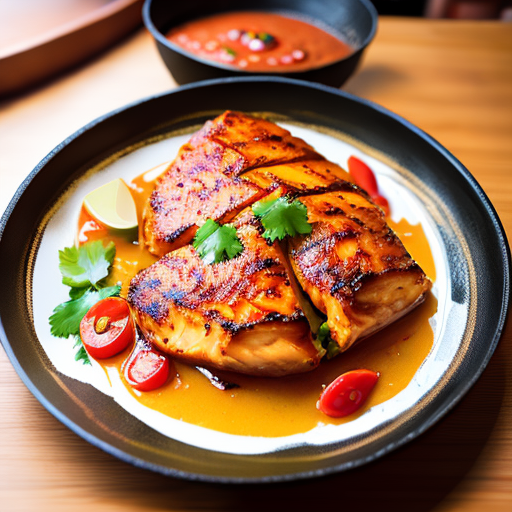
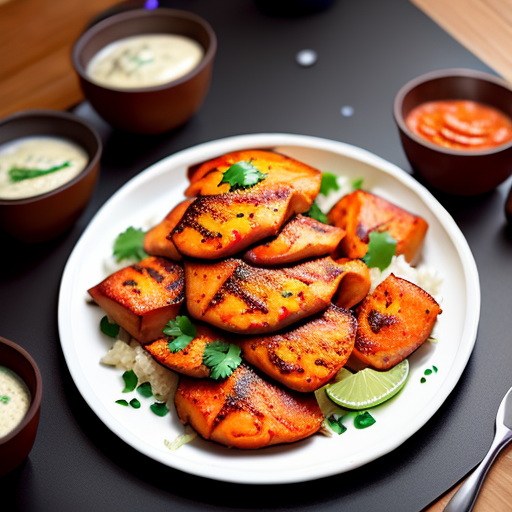
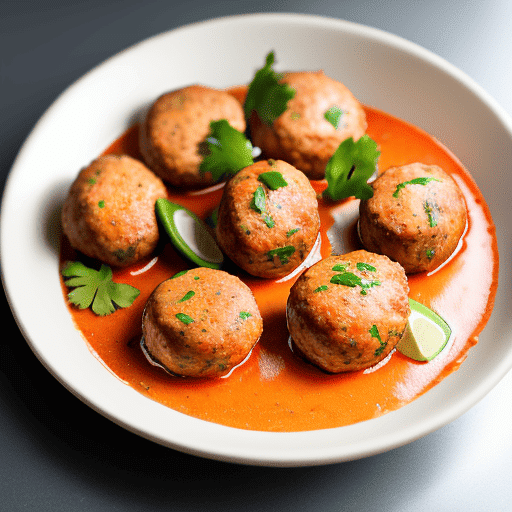
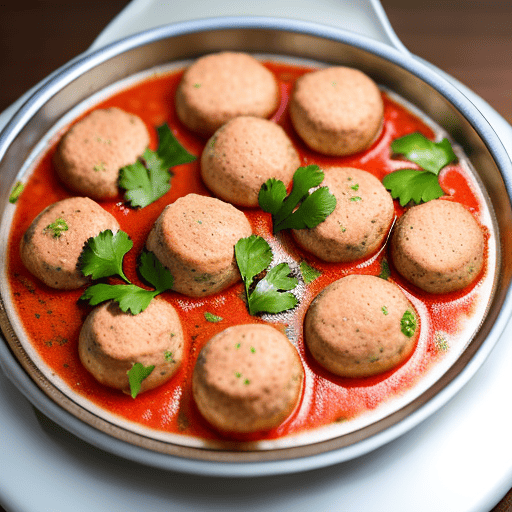
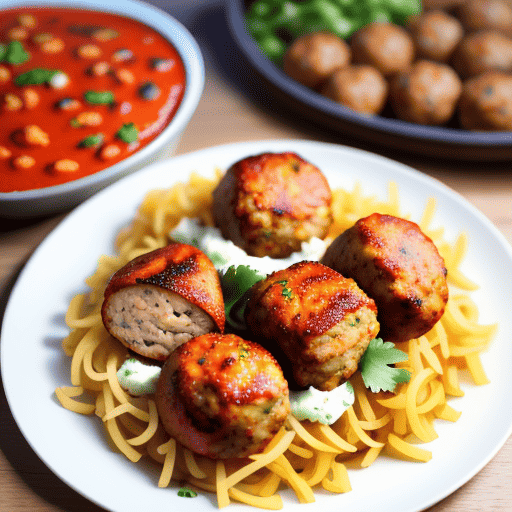
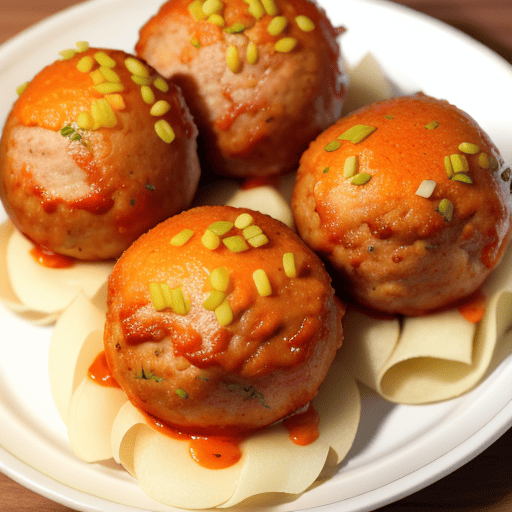
A Savory Chicken Kofta Recipe

Now, let’s indulge in the pleasure of making delicious chicken kofta at home:

A platter featuring an assortment of kofta variations.

Ingredients:

  • 500g ground chicken
  • 1/4 cup finely chopped onions
  • 2 garlic cloves, minced
  • 1-inch ginger, grated
  • 2 green chilies, finely chopped
  • 2 tablespoons chopped cilantro
  • 1 teaspoon ground cumin
  • 1 teaspoon garam masala
  • 1/2 teaspoon chili powder
  • 1/4 cup breadcrumbs
  • Salt to taste
  • Vegetable oil for frying

Instructions:

  1. In a large bowl, combine the ground chicken, onions, garlic, ginger, green chilies, cilantro, cumin, garam masala, chili powder, breadcrumbs, and salt.
  2. Mix the ingredients thoroughly until well combined and let the mixture rest for 15 minutes to allow the flavors to meld.
  3. With oiled hands, shape the mixture into small balls or cylindrical patties, forming the kofta.
  4. Heat the oil in a pan over medium heat. Fry the kofta until they are golden brown and cooked through.
  5. Place the fried kofta on a paper towel to remove excess oil.

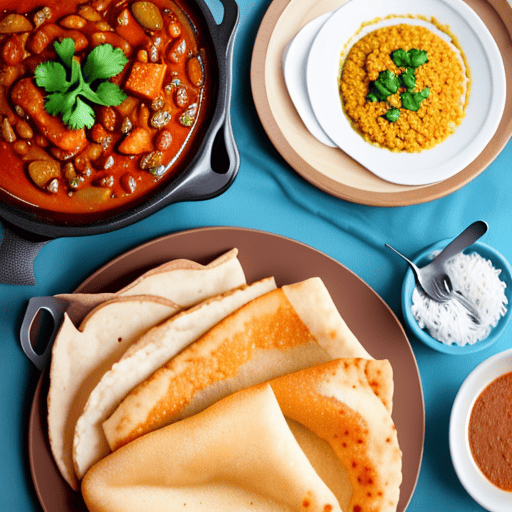
Serve the scrumptious chicken kofta with steamed rice, naan, or a side salad for a complete and satisfying meal.

An artfully arranged plate of perfectly cooked chicken kofta

FAQs about Chicken Kofta

  1. Can I use ground lamb instead of chicken?

Absolutely! Ground lamb can be a delicious alternative, offering a distinct flavor profile that complements the spices beautifully.

  1. What are some serving suggestions for chicken kofta?

Chicken kofta pairs well with mint chutney, cucumber yogurt sauce, or a tangy tamarind sauce. These condiments add depth to the dish and enhance the overall experience.

  1. Can I bake the kofta instead of frying them?

Certainly! Baking the kofta is a healthier option. Preheat the oven to 375°F (190°C) and bake the kofta for 20-25 minutes or until cooked through.

  1. Is it possible to make kofta in advance and reheat it?

Yes, you can prepare the kofta in advance and reheat them when needed. However, ensure they are properly stored in an airtight container in the refrigerator.

  1. Can I make chicken kofta gluten-free?

Absolutely! Simply replace the breadcrumbs with gluten-free alternatives like ground oats or almond flour.

Conclusion

Chicken kofta is a delightful amalgamation of flavors and nutrients, making it a favorite among food enthusiasts. Whether you savor the classic recipe or experiment with exciting variations, chicken kofta never fails to impress. Armed with troubleshooting tips and a scrumptious recipe, you are now ready to embark on a culinary journey that celebrates the rich heritage of this delectable dish.

So, let your creativity soar as you savor the magic of chicken kofta!

VersaBlog: Exploring Health, Fitness, Finance, and More
“Embrace the Taste of Afghanistan: Cooking Chicken Afghani at Home”

Indulge in the rich and flavorful Chicken Afghani, a traditional Afghan dish that tantalizes taste buds with its aromatic spices and tender chicken. Learn how to make this delightful delicacy and explore the cultural significance behind this mouthwatering recipe.

Introduction: Embrace the Allure of Chicken Afghani

Welcome to the enticing world of Chicken Afghani! A culinary treasure from Afghanistan, this dish offers a delightful amalgamation of aromatic spices and succulent chicken. In this article, we will take you on a journey through the rich flavors and cultural significance of Chicken Afghani. From its origin to the ingredients that make it special, and a step-by-step recipe guide, prepare yourself to embark on an unforgettable gastronomic adventure!

What is Chicken Afghani?

Chicken Afghani is a renowned Afghan dish that exemplifies the country’s rich culinary heritage. It is a dish where succulent pieces of chicken are marinated in a luscious mixture of yogurt and a blend of flavorful spices, which infuse the meat with unparalleled taste and tenderness. This delightful recipe holds a special place in Afghan culture and is often served at celebratory gatherings and festivals.

The Cultural Significance of Chicken Afghani

In Afghanistan, food plays a vital role in their culture and traditions. Chicken Afghani, with its mouthwatering taste, is not only a culinary delight but also a symbol of togetherness and celebration. This dish brings families and friends closer, and the act of cooking and sharing it reinforces bonds and creates cherished memories. The aromatic spices used in Chicken Afghani reflect the country’s historical trade routes and cultural exchanges, making it a true representation of Afghan heritage.

Exploring the Ingredients

Let’s delve into the key ingredients that give Chicken Afghani its distinctive taste and aroma:

1. Chicken: The Heart of the Dish

High-quality, boneless chicken pieces are the star ingredient of Chicken Afghani. The chicken is cut into bite-sized chunks, ensuring that each piece soaks up the flavors of the marinade, resulting in tender, juicy bites.

2. Yogurt: The Tenderizer

Yogurt serves as a natural tenderizer in the marinade. Its acidity helps break down the proteins in the chicken, making it incredibly soft and succulent.

3. Spices: A Symphony of Flavors

The blend of spices used in Chicken Afghani is what sets it apart. A combination of cumin, coriander, turmeric, garam masala, and other secret spices infuses the chicken with a symphony of flavors that dance on your taste buds.

chicken afghani images

4. Garlic and Ginger: The Aromatic Enhancers

Garlic and ginger add a pungent and aromatic touch to the marinade, elevating the overall taste and aroma of the dish.

5. Lemon Juice: The Zesty Freshness

A splash of freshly squeezed lemon juice brightens up the flavors, adding a refreshing and tangy twist to the marinade.

Preparing the Chicken Afghani Marinade

To create the perfect Chicken Afghani, the marinade plays a crucial role. The combination of yogurt, spices, garlic, ginger, and lemon juice is the key to infusing the chicken with extraordinary flavors. Here’s a step-by-step guide on how to prepare the marinade:

  1. In a mixing bowl, take a generous amount of yogurt, ensuring it covers all the chicken pieces.
  2. Add the ground spices, including cumin, coriander, turmeric, garam masala, and any secret spices you desire.
  3. Crush fresh garlic and ginger, and add them to the bowl for an aromatic boost.
  4. Squeeze the juice of a ripe lemon into the mixture, adding a zesty freshness.
  5. Mix all the ingredients thoroughly until you have a smooth and creamy marinade.

Marinating the Chicken

With the marinade perfectly prepared, it’s time to infuse the chicken with its delectable flavors: marination awaits!

  1. Add the chicken pieces to the marinade and ensure they are well-coated from all sides.
  2. Cover the bowl with plastic wrap and refrigerate for at least 4-6 hours, allowing the chicken to absorb all the flavors.

The Cooking Process

Once the chicken is marinated to perfection, it’s time to cook the Chicken Afghani:

  1. Before you begin, preheat your grill or oven to a delightful medium-high heat.
  2. Thread the marinated chicken pieces onto skewers, ensuring they are evenly spaced.
  3. Place the skewers on the grill or in the oven and cook for about 15-20 minutes or until the chicken is fully cooked and has a beautiful golden color.
  4. To ensure evenly cooked perfection, remember to turn the skewers occasionally during the cooking process.

Serving and Enjoying Chicken Afghani

Congratulations! Your Chicken Afghani is now ready to be served and savored. This delectable dish pairs wonderfully with Afghani rice, naan bread, or a fresh salad. Garnish it with cilantro, mint leaves, and a squeeze of lemon for an extra burst of flavor.

afghani chicken

Variations of Chicken Afghani

  1. Vegetarian Version: For our vegetarian friends, you can substitute the chicken with paneer (Indian cottage cheese) or tofu. The marinade works just as well with these alternatives, creating a mouthwatering vegetarian delight.
  2. Grilled Vegetables: Experiment with the marinade by using it for marinating a mix of colorful vegetables. Grilled bell peppers, onions, and zucchini complement the flavors of the Chicken Afghani marinade beautifully.

Nutritional Value of Chicken Afghani (per serving)

NutrientAmount Per Serving
Calories350
Total Fat15g
Saturated Fat5g
Cholesterol120mg
Sodium700mg
Carbohydrates8g
Dietary Fiber2g
Sugars3g
Protein45g

Troubleshooting: Tips to Perfect Your Chicken Afghani

  1. Dry Chicken: If your chicken turns out dry, try marinating it for a longer duration to ensure it absorbs enough moisture.
  2. Too Spicy: To reduce the spiciness, use less chili powder in the marinade or balance it with a dollop of yogurt when serving.
  3. Marinade Separation: If the marinade separates, mix it thoroughly before adding the chicken or use a whisk to ensure a smooth texture.

Tips for the Best Chicken Afghani

  1. Use Fresh Ingredients: To achieve the most flavorful outcome, use fresh spices, garlic, ginger, and lemon juice.
  2. Patience with Marination: Allow the chicken to marinate for the recommended time to maximize flavor infusion.
  3. Preheat the Grill/Oven: Ensure your grill or oven is preheated before cooking to get perfectly grilled chicken.

FAQs about Chicken Afghani

  1. What makes Chicken Afghani different from other chicken dishes?
    • Chicken Afghani stands out due to its unique blend of spices and the use of yogurt as a tenderizer, resulting in a dish that is tender, juicy, and bursting with flavor.
  2. Can I use chicken with bones for Chicken Afghani?
    • While boneless chicken is commonly used, you can use chicken with bones if you prefer. Just ensure that the marinade seeps into the meat for the best results.
  3. What is the best way to cook Chicken Afghani indoors?
    • If you don’t have access to a grill, you can cook Chicken Afghani in the oven or on a stovetop grill pan for similar delicious results.
chicken afghani
  1. Is Chicken Afghani a spicy dish?
    • The spiciness of Chicken Afghani can be adjusted based on your preference.
    • Customize the level of spiciness to your liking by adding more or less chili powder as per your taste preferences.
  2. Can I marinate the chicken overnight?
    • Absolutely! Marinating the chicken overnight allows the flavors to intensify, resulting in an even more delicious and aromatic dish.
  3. Are there vegetarian alternatives to Chicken Afghani?
    • Yes, you can use paneer (Indian cottage cheese) or tofu as a substitute for chicken to create a vegetarian version of this delightful dish.

Conclusion: Savor the Flavors of Afghanistan

In conclusion, Chicken Afghani is much more than just a culinary delight; it’s a reflection of the vibrant Afghan culture and its rich heritage. The blend of aromatic spices, succulent chicken, and the warmth of shared meals make this dish a true treasure. So, embrace the flavors of Afghanistan and prepare Chicken Afghani to create lasting memories with your loved ones.

Now, it’s time to embark on your Chicken Afghani journey and savor the taste of Afghanistan’s cultural heritage. Bon appétit!

VersaBlog: Exploring Health, Fitness, Finance, and More
A Clash of Chicken Flavors: Kali Mirch vs Malai Tikka

Discover the mouthwatering world of Kali Mirch vs Malai Tikka! This comprehensive article delves into their recipes, variations, nutritional value, troubleshooting tips, and FAQs, presenting expert insights and first-hand experiences.

Introduction

Chicken dishes have an irreplaceable charm in the culinary world. Two delectable choices that have captured the hearts of food enthusiasts are Chicken Kali Mirch and Chicken Malai Tikka. Both dishes offer unique flavors and textures that leave your taste buds tingling for more. In this article, we’ll take an in-depth look at these two sumptuous recipes, explore their variations, delve into their nutritional value, provide troubleshooting tips, and offer some useful cooking advice.

Chicken Kali Mirch vs Chicken Malai Tikka

Let’s start by examining the key differences between Chicken Kali Mirch and Chicken Malai Tikka to understand what sets them apart.

Chicken Kali Mirch

Chicken Kali Mirch, also known as Pepper Chicken, is a mouthwatering Indian delicacy that boasts a rich and robust flavor profile. The star ingredient that gives this dish its distinctive taste is black pepper, which is ground fresh to infuse the chicken with its aromatic spiciness. This dish often includes a blend of spices, yogurt, and sometimes cream to create a creamy yet peppery gravy. The succulent pieces of chicken are cooked to perfection, making it a favorite among spice enthusiasts.

Discover the creative variations of Chicken Kali Mirch. One version includes creamy mushroom pepper chicken, while another features coconut-infused pepper chicken

Chicken Malai Tikka

On the other hand, Chicken Malai Tikka represents the epitome of mildness and creaminess. Originating from the Indian subcontinent, this dish involves marinating chicken pieces in a luscious mixture of cream, yogurt, and mild spices. The chicken is then grilled or baked until it acquires a tender and charred exterior while remaining tender on the inside. The creaminess and gentle spices make this dish a delightful treat for those who prefer milder flavors.

Recipes

Chicken Kali Mirch Recipe

Preparation time: 20 minutes Cooking time: 30 minutes Total time: 50 minutes

Ingredients:

  • A delectable medley of boneless chicken, meticulously prepared, and expertly sliced into delightful bite-sized pieces, totaling 500 grams in weight.
  • 1 tablespoon black peppercorns, freshly ground
  • 1 cup yogurt
  • 2 tablespoons vegetable oil
  • 1 large onion, finely chopped
  • 2 teaspoons ginger-garlic paste
  • 1 teaspoon cumin powder
  • 1 teaspoon coriander powder
  • 1/2 teaspoon turmeric powder
  • 1/2 cup fresh cream
  • Salt to taste
  • Fresh coriander leaves for garnish

Instructions:

  1. Start by combining the tender chicken pieces, half of the freshly ground black pepper, creamy yogurt, and a pinch of salt in a mixing bowl. Ensure a thorough mix, allowing the delightful flavors to meld as you let it marinate for a minimum of 1 hour.
  2. Next, in a pan, heat the vegetable oil to perfection and sauté the finely chopped onions until they exude a golden-brown hue, infusing the air with their delightful aroma. Add the ginger-garlic paste to the mix and sauté for another minute, releasing their tantalizing essence.
  3. Now, introduce the marinated chicken to the pan, along with the remaining black pepper, cumin powder, coriander powder, turmeric powder, and salt. Watch as the kitchen transforms into a culinary haven, filled with the delightful scent of spices intermingling with tender chicken. Cook with care until the chicken achieves a tender, melt-in-your-mouth texture, a sign that it is cooked to perfection.
Essential tips for preparing the perfect chicken dishes. Emphasizing the significance of marination, balancing flavors, choosing cooking methods, and using fresh ingredients for the best results
  1. Just when you think it couldn’t get any better, introduce a touch of luxury by stirring in the fresh cream, elevating the dish to new heights of indulgence. Cook for a brief 2 minutes, allowing the creaminess to infuse the dish with its velvety goodness.
  2. For the finishing touch, generously garnish the dish with fresh coriander leaves, adding a pop of green to the stunning medley of colors. Ready to be devoured, serve this delectable creation hot with a side of steamed rice or soft, pillowy naan, and witness the delight on your guests’ faces as they savor every exquisite bite.

Chicken Malai Tikka Recipe

Preparation time: 15 minutes Marination time: 2 hours Cooking time: 20 minutes Total time: 2 hours 35 minutes

Ingredients:

  • 500 grams of succulent boneless chicken, expertly sliced into delectable bite-sized pieces.
  • 1 cup yogurt
  • 1/2 cup fresh cream
  • 1 tablespoon ginger-garlic paste
  • 1 tablespoon garam masala
  • 1/2 tablespoon white pepper powder
  • 1/2 tablespoon cardamom powder
  • 1/2 tablespoon cumin powder
  • 1 tablespoon lemon juice
  • Salt to taste
  • Skewers for grilling

Instructions:

  1. In a large mixing bowl, combine yogurt, fresh cream, ginger-garlic paste, garam masala, white pepper powder, cardamom powder, cumin powder, lemon juice, and salt to form a smooth marinade.
    • Gently incorporate the luscious chicken pieces into the marinade, ensuring they are completely coated in its flavorful embrace.
    • Cover the bowl and refrigerate for at least 2 hours to allow the flavors to meld.
  2. Preheat the grill or oven to medium-high heat.
  3. Thread the marinated chicken pieces onto skewers.
  4. Grill or bake the skewers for about 15-20 minutes, turning them occasionally until the chicken is cooked through and slightly charred on the edges.
  5. Serve the Chicken Malai Tikka hot with mint chutney and onion rings.
An appetizing display of Chicken Malai Tikka, showcasing tender chicken pieces marinated in creamy yogurt and spices. The dish is presented on a wooden platter, accompanied by mint chutney and onion rings

Variations

Chicken Kali Mirch Variations

Chicken Kali Mirch allows for various creative twists that cater to individual tastes. Some popular variations include:

  1. Creamy Mushroom Pepper Chicken: Enhance the dish with the addition of sautéed mushrooms and a creamier gravy for an earthy flavor profile.
  2. Coconut Pepper Chicken: Infuse the dish with the subtle sweetness of coconut milk, balancing out the pepper’s spiciness.
  3. Kadai Pepper Chicken: Incorporate a blend of bell peppers and onions to create a delightful fusion of flavors.

Chicken Malai Tikka Variations

Chicken Malai Tikka’s versatility encourages experimentation. Here are a few delightful variations to explore:

  1. Tandoori Malai Tikka: Add tandoori masala to the marinade for a smoky and robust twist to the classic recipe.
  2. Kalmi Kebab Malai Tikka: Use drumsticks instead of boneless chicken, and let the marinade seep into the meat for an even more succulent experience.
  3. Spicy Malai Tikka: For those who enjoy a bit of heat, incorporate a hint of red chili powder or crushed black pepper into the marinade.
The chicken skewers are evenly charred, giving them a tantalizing smoky flavor

Nutritional Value

Both Chicken Kali Mirch and Chicken Malai Tikka have their unique nutritional characteristics, offering a blend of proteins, vitamins, and minerals essential for a balanced diet.

Nutritional Value of Chicken Kali Mirch:

(per 100g serving)

  • Calories: 185 kcal
  • Protein: 21.5g
  • Fat: 9.2g
  • Carbohydrates: 4.6g
  • Fiber: 1.2g
  • Calcium: 25mg
  • Iron: 1.8mg
  • Vitamin C: 1.7mg
  • Vitamin B-6: 0.3mg

Nutritional Value of Chicken Malai Tikka:

(per 100g serving)

  • Calories: 240 kcal
  • Protein: 19.6g
  • Fat: 15.2g
  • Carbohydrates: 6.3g
  • Fiber: 0.8g
  • Calcium: 38mg
  • Iron: 0.9mg
  • Vitamin C: 1.2mg
  • Vitamin B-6: 0.2mg

Troubleshooting Tips

While preparing Chicken Kali Mirch and Chicken Malai Tikka, you might encounter a few challenges. Here are some troubleshooting tips to ensure your dishes come out perfect every time:

For Chicken Kali Mirch:

  1. Too Spicy: If the dish turns out too spicy, try adding a tablespoon of yogurt or a splash of cream to mellow down the heat.
  2. Dry Chicken: If the chicken becomes dry during cooking, cover the pan with a lid and let it simmer on low heat to retain moisture.
A colorful array of spices, including black peppercorns, cumin, coriander, turmeric, and garam masala, used in the preparation of Chicken Kali Mirch and Chicken Malai Tikka."

For Chicken Malai Tikka:

  1. Chicken Not Tender: If the chicken doesn’t turn out tender, marinate it for a longer duration to allow the cream to break down the fibers.
  2. Burning Skewers: If the skewers tend to burn quickly, soak them in water for 30 minutes before threading the chicken to prevent charring.

Tips for the Perfect Chicken Dish

  1. Marination is Key: Whether you’re preparing Chicken Kali Mirch or Chicken Malai Tikka, marinating the chicken for an adequate time enhances the flavors and tenderizes the meat.
  2. Balancing Flavors: Pay attention to the balance of spices and seasonings in both recipes. Adjust them according to your preference to achieve the perfect harmony of flavors.
  3. Grilling vs. Baking: Choose between grilling and baking based on your culinary tools and desired texture. Grilling imparts a smoky flavor, while baking yields a more evenly cooked dish.
  4. Fresh Ingredients: Always use fresh ingredients for the best results. Freshly ground pepper and aromatic spices elevate the taste of Chicken Kali Mirch, while quality cream is essential for the creaminess of Chicken Malai Tikka.
A collection of creamy ingredients, such as yogurt, fresh cream, and Greek yogurt, that lend their rich textures to Chicken Malai Tikka

FAQs

  1. Can I use bone-in chicken for Chicken Kali Mirch and Chicken Malai Tikka? Yes, bone-in chicken can be used for both dishes, but the cooking time may increase slightly to ensure the chicken is thoroughly cooked.
  2. Are these dishes suitable for a party menu? Absolutely! Both Chicken Kali Mirch and Chicken Malai Tikka are crowd-pleasers and will be a hit at any gathering.
  3. Can you tell me please what if i use Greek yogurt instead of regular yogurt? Yes, Greek yogurt can be substituted for regular yogurt, but the marination time may vary as Greek yogurt is thicker.
  4. How can I make Chicken Malai Tikka vegan? To make a vegan version of Chicken Malai Tikka, you can use tofu or cauliflower florets instead of chicken and substitute dairy-based cream and yogurt with plant-based alternatives.
  5. What about freezing the marinated chicken for later use? Yes, you can freeze the marinated chicken for up to 3 months. Thaw it in the refrigerator before grilling or baking.
  6. What side dishes pair well with these dishes? Chicken Kali Mirch goes well with naan, steamed rice, or biryani, while Chicken Malai Tikka pairs nicely with mint chutney and buttered naan.

Conclusion

In conclusion, the battle of flavors between Chicken Kali Mirch and Chicken Malai Tikka is a delightful one. While Chicken Kali Mirch offers a spicy and robust experience with its black pepper-infused gravy, Chicken Malai Tikka tantalizes taste buds with its creamy and mild essence. Whichever dish you choose, these two chicken delicacies are sure to leave a lasting impression on your palate.

So, gather your ingredients and embark on a culinary adventure with these delectable recipes, exploring variations, and savoring the unique tastes of Chicken Kali Mirch vs Chicken Malai Tikka.

============================================

VersaBlog: Exploring Health, Fitness, Finance, and More
Egg Fried Rice vs Mushroom Fried Rice: A Delicious Duel of Flavors and Nutrients

In this comprehensive article, we explore the delightful world of Egg Fried Rice vs Mushroom Fried Rice. Learn about their recipes, variations, nutritional values, troubleshooting tips, and more. Discover the differences and similarities between these two delectable dishes and gain valuable insights into their preparation and benefits.

Introduction: A Tantalizing Culinary Confrontation

Are you craving a delightful rice dish with a burst of flavors? Look no further than Egg Fried Rice and Mushroom Fried Rice. These two popular recipes offer unique tastes and textures, making them favorites among food enthusiasts worldwide. In this article, we embark on a gastronomic journey to compare and contrast Egg Fried Rice and Mushroom Fried Rice, diving into their preparation, variations, nutritional values, troubleshooting tips, and more. So, let’s buckle up our aprons and get cooking!

Egg Fried Rice vs Mushroom Fried Rice: Exploring the Distinctive Recipes

Egg Fried Rice Recipe:

Ingredients:

  • Cooked white rice
  • Eggs
  • Vegetables (carrots, peas, bell peppers, etc.)
  • Soy sauce
  • Sesame oil
  • Garlic
  • Green onions
  • Salt and pepper to taste

Instructions:

  1. Heat a large skillet or wok over medium-high heat and add some cooking oil.
  2. Crack the eggs into the pan and scramble them until they’re cooked. Set them aside.
  3. In the same pan, sauté the garlic and vegetables until they become tender.
  4. Add the cooked rice and scrambled eggs to the pan, tossing them together with the vegetables.
  5. Pour soy sauce and sesame oil over the mixture, stirring well to coat everything evenly.
  6. Add your desired amount of salt and pepper to enhance the flavors, tailoring it to your personal taste preferences.
  7. Finish off the dish with a generous sprinkle of freshly chopped green onions for an enticing presentation, and serve the delectable creation while it’s still piping hot.

Mushroom Fried Rice Recipe:

Ingredients:

  • Cooked white rice
  • Fresh mushrooms (shiitake, button, or oyster)
  • Onions
  • Garlic
  • Soy sauce
  • Oyster sauce
  • Vegetable broth
  • Sesame oil
  • Green onions
  • Salt and pepper to taste

Instructions:

  1. Begin the cooking process by heating up a wok or skillet with a drizzle of cooking oil over medium heat.
  2. Add chopped onions and garlic, sautéing until they become translucent.
  3. Toss in the mushrooms and cook until they turn tender and lightly browned.
  4. Pour soy sauce, oyster sauce, and vegetable broth over the mushrooms, stirring well.
  5. Add the cooked rice to the pan, mixing it thoroughly with the mushroom sauce.
  6. Drizzle sesame oil for a delightful aroma and flavor.
  7. Add a pinch of salt and a dash of pepper to suit your individual taste preferences.
  8. Garnish with chopped green onions before serving.

Variations: Putting a Unique Spin on the Classics

Egg Fried Rice Variations:

  1. Shrimp Egg Fried Rice: Add succulent shrimp to the traditional recipe for an irresistible seafood twist.
  2. Spicy Egg Fried Rice: Sprinkle some crushed red pepper flakes or chili sauce to add a kick of spiciness.
  3. Pineapple Egg Fried Rice: Mix in diced pineapple chunks for a delightful tropical touch.

Mushroom Fried Rice Variations:

  1. Vegetarian Mushroom Fried Rice: Make it entirely meat-free by adding extra veggies like broccoli, zucchini, and carrots.
  2. Chicken Mushroom Fried Rice: Incorporate tender, diced chicken to elevate the dish with a protein boost.
  3. Curry Mushroom Fried Rice: Infuse the rice with aromatic curry spices for an exotic flavor profile.

Nutritional Value: A Nutrient-Packed Showdown

Both Egg Fried Rice and Mushroom Fried Rice offer a range of essential nutrients, making them not only delicious but also beneficial for your health. Let’s explore their nutritional value:

Egg Fried Rice Nutritional Value:

Eggs are a great source of protein, supplying essential amino acids vital for muscle repair and overall growth. They are also rich in vitamin B12, which aids in maintaining nerve health. Additionally, eggs contain selenium, which acts as an antioxidant, protecting cells from damage.

Mushroom Fried Rice Nutritional Value:

Mushrooms are rich in essential nutrients while being low in calories, making them a wholesome addition to your diet. They provide a considerable amount of vitamins like riboflavin (B2), niacin (B3), and pantothenic acid (B5). Moreover, mushrooms are an excellent source of minerals like copper, which supports the production of red blood cells, and selenium, known for its antioxidant properties.

Troubleshooting: Overcoming Common Cooking Challenges

Cooking rice dishes can be a breeze, but sometimes challenges arise. Here are some troubleshooting tips to ensure your Egg Fried Rice or Mushroom Fried Rice turns out perfect every time:

Rice Turns Mushy:

  • Ensure you’re using the correct rice-to-water ratio.
  • Let the rice cool down a bit before using it in the recipe.

Rice is Too Dry:

  • Add a little vegetable broth or water to moisten the rice.

Lack of Flavor:

  • Adjust the amount of soy sauce, sesame oil, or other seasonings to your taste.

Ingredients Stick to the Pan:

  • Use a well-seasoned or non-stick skillet to prevent sticking.

FAQ – Frequently Asked Questions

Q: Can I use brown rice instead of white rice for these recipes? A: Yes, you can substitute brown rice, but keep in mind that it may require a longer cooking time.

Q: How can I store leftover fried rice? A: Transfer it to an airtight container and refrigerate for up to three days.

Before enjoying your leftovers, simply reheat them in a pan or microwave until they are warm and ready to be savored again.

Q: Is it possible to make these recipes gluten-free? A: Absolutely! Use gluten-free soy sauce and oyster sauce to make the dishes gluten-free.

Q: Can I add other vegetables to these recipes? A: Certainly! Feel free to experiment with your favorite vegetables to create your custom fried rice.

Q: Are these recipes suitable for vegans? A: The Egg Fried Rice can be easily adapted for vegans by substituting eggs with tofu. For Mushroom Fried Rice, it is naturally vegan-friendly.

Q: Can I freeze these dishes for later consumption? A: While it’s possible to freeze fried rice, the texture may change slightly upon reheating.

Conclusion: Savor the Dueling Delicacies

In the battle of Egg Fried Rice vs Mushroom Fried Rice, both contenders emerge victorious in their unique ways. Each dish boasts enticing flavors and brings its nutritional benefits to the table. Whether you’re a fan of the hearty Egg Fried Rice or the earthy Mushroom Fried Rice, one thing is certain – they will delight your taste buds and leave you craving more.

So, the next time you’re in the mood for a satisfying rice dish, give these recipes a try. Whether you opt for the comforting familiarity of Egg Fried Rice or the earthy charm of Mushroom Fried Rice, you’re in for a treat.

VersaBlog: Exploring Health, Fitness, Finance, and More
Chicken 78 vs Chicken Keema: Exploring Recipes, Variations, FAQs, Cooking Time, Nutritional Value, Troubleshooting, and Tips

Discover the differences between Chicken 78 vs Chicken Keema in this comprehensive article. Explore various recipes, variations, cooking times, nutritional values, troubleshooting tips, and more. Unleash your culinary expertise with these delectable chicken dishes.

Introduction

In the world of poultry, two chicken delicacies stand out – Chicken 78 and Chicken Keema. Each brings a unique flavor profile and versatility to the table, making them popular choices in households and restaurants alike. This article delves deep into the comparisons between Chicken 78 and Chicken Keema, featuring an array of recipes, variations, FAQs, cooking time guidelines, nutritional value insights, troubleshooting tips, and expert culinary suggestions.

Chicken 78 vs Chicken Keema: A Flavorful Face-Off

Let’s start with the heart of the matter – the fundamental differences between Chicken 78 and Chicken Keema.

The Chicken 78 Advantage

Chicken 78 is a culinary marvel that originates from a secret blend of 78 aromatic spices. The secret concoction lends a distinctive taste, and each bite is an explosion of flavors. Whether you prefer it grilled, fried, or in a curry, Chicken 78 offers a delightful experience for your taste buds.

Embracing Chicken Keema

On the other hand, Chicken Keema is a minced chicken dish known for its grounded texture and earthy flavors. Its versatility shines through various recipes, making it an excellent choice for kebabs, parathas, and even stuffed vegetables. The richness of Chicken Keema makes it a beloved option for those seeking a hearty meal.

Delicious Recipes to Savor

1. Chicken 78 Tikka Masala

Ingredients:

  • 500 grams of Chicken 78 pieces, boneless and skinless
  • 1 cup plain yogurt
  • 2 tablespoons ginger-garlic paste
  • 1 tablespoon garam masala
  • 1 tablespoon paprika
  • 1 teaspoon turmeric powder
  • 1 teaspoon cumin powder
  • 1 teaspoon coriander powder
  • 1 tablespoon lemon juice
  • Salt to taste
  • 2 tablespoons oil
  • 1 large onion, finely chopped
  • 2 tomatoes, pureed
  • 1/2 cup heavy cream
  • Fresh cilantro leaves for garnish

Instructions:

  1. In a large bowl, mix yogurt, ginger-garlic paste, garam masala, paprika, turmeric powder, cumin powder, coriander powder, lemon juice, and salt to create the marinade.
  2. Add Chicken 78 pieces to the marinade and coat them thoroughly. Gently place the bowl’s lid on top, ensuring a snug fit, and then transfer it to the refrigerator, allowing the flavors to meld for a minimum of 2 hours.
  3. Grill the Chicken 78 skewers for 15-20 minutes, turning them occasionally until they are charred and cooked through.
  4. In a separate pan, heat oil and sauté chopped onions until they turn golden brown.
  5. Add tomato puree to the pan and cook until the oil separates from the mixture.
  6. Stir in heavy cream, salt, and grilled Chicken 78 pieces. Simmer for 5 minutes.
  7. Sprinkle a generous handful of freshly chopped cilantro leaves over the dish, imparting a burst of vibrant green to the presentation. Served piping hot, accompanied by the choice of either soft, fluffy naan or perfectly steamed rice, this culinary masterpiece promises a delightful feast for the senses.

2. Spicy Chicken Keema Paratha

Ingredients:

  • 250 grams minced Chicken Keema
  • 2 cups whole wheat flour
  • 1 onion, finely chopped
  • 1 green chili, finely chopped
  • 1/4 cup fresh coriander leaves, chopped
  • 1 teaspoon ginger-garlic paste
  • 1/2 teaspoon cumin powder
  • 1/2 teaspoon coriander powder
  • 1/4 teaspoon turmeric powder
  • 1/4 teaspoon red chili powder
  • Salt to taste
  • 2 tablespoons oil
  • Water for kneading the dough
  • Butter or ghee for cooking the parathas

Instructions:

  1. In a mixing bowl, combine the whole wheat flour, salt, and water to make a smooth dough.
  2. Allow the mixture to cover and rest for a duration of 30 minutes.
  3. Heat oil in a pan and sauté the chopped onions and green chilies until the onions turn translucent.
  4. Add ginger-garlic paste and minced Chicken Keema. Cook until the chicken is fully cooked and the moisture evaporates.
  5. Add cumin powder, coriander powder, turmeric powder, red chili powder, and salt to the Keema mixture.
  6. Give the mixture a thorough stir and continue cooking for an additional 2 minutes.
  7. Partition the dough into small balls, then proceed to roll each ball into a small circle.
  8. Place a spoonful of Chicken Keema filling in the center of a dough circle and bring the edges together to seal it.
  9. Roll out the stuffed dough ball into a flat paratha.
  10. Heat a skillet or tawa over medium heat and cook the paratha with butter or ghee until golden brown on both sides.
  11. Serve the spicy Chicken Keema parathas with yogurt and pickle.

Variations for Every Palate

1. Vegetarian Twist: Cauliflower 78

For vegetarians who crave the taste of Chicken 78, Cauliflower 78 offers an excellent alternative. Cauliflower florets are marinated and cooked with the same 78 spices, delivering a similar taste experience.

2. Lamb Keema Delight

For a meatier variation, Lamb Keema is an ideal choice. The robust flavors of lamb perfectly complement the grounded texture of Keema.

3. Indo-Chinese Fusion: Chicken 78 Manchurian

Fusing the essence of Chicken 78 with tangy Chinese flavors, Chicken 78 Manchurian is a delightful fusion dish that pleases the adventurous palate.

4. Vegan Keema Curry

Vegans can relish a plant-based version of Keema Curry using soy granules or lentils. This vegan delight retains the essence of traditional Keema without compromising on taste.

5. Lemon Pepper Chicken 78

Add a zesty twist to Chicken 78 by infusing it with the freshness of lemon and the kick of cracked black pepper.

6. Keema Naan Pocket

Stuff Chicken Keema into soft, fluffy naan bread to create a satisfying and portable meal – the Keema Naan Pocket.

FAQs

Q: Is Chicken 78 too spicy for kids? A: Chicken 78’s spiciness can be adjusted according to taste. Reduce the amount of hot spices or pair it with a cooling yogurt dip to make it kid-friendly.

Q: Can I use Chicken Keema as a stuffing for vegetables? A: Absolutely! Chicken Keema works wonderfully as a stuffing for bell peppers, tomatoes, or even zucchinis, adding richness and flavor to the dish.

Q: How long should I marinate Chicken 78 for grilling? A: For the best results, marinate Chicken 78 for at least 2 to 4 hours before grilling. This allows the spices to infuse the chicken, enhancing its taste.

Q: Can I use Chicken Keema to make meatballs? A: Yes, you can! Chicken Keema can be shaped into meatballs and cooked in a tangy tomato-based sauce for a delightful meal.

Q: Are Chicken 78 and Chicken Keema gluten-free? A: Both Chicken 78 and Chicken Keema are naturally gluten-free. However, it’s essential to check the ingredients used in the accompanying sauces or marinades.

Q: Can I freeze Chicken 78 or Chicken Keema for later use? A: Yes, you can freeze both Chicken 78 and Chicken Keema. Store them in airtight containers and consume within 2-3 months for the best quality.

Cooking Time and Tips

Cooking Time Guidelines:

  • Chicken 78 Tikka: 15-20 minutes
  • Chicken Keema Paratha: 30-35 minutes
  • Chicken 78 Korma: 40-45 minutes
  • Chicken Keema Samosas: 25-30 minutes
  • BBQ Chicken 78 Skewers: 12-15 minutes
  • Chicken Keema Biryani: 45-50 minutes

Expert Tips:

  1. To achieve a smoky flavor in Chicken 78 Tikka, use a charcoal grill.
  2. While cooking Chicken Keema, ensure it is cooked thoroughly to avoid any raw taste.
  3. For a rich and creamy Chicken 78 Korma, use freshly ground cashew paste.
  4. Brush BBQ Chicken 78 Skewers with melted butter while grilling for added flavor.
  5. To prevent the Chicken Keema from sticking to the pan, add a splash of water while cooking.

Nutritional Value Insights

Chicken 78 and Chicken Keema are excellent sources of protein, vitamins, and minerals. They are low in carbohydrates, making them suitable options for those following low-carb diets. However, it’s essential to consider the cooking method and additional ingredients used, as they can impact the overall nutritional value.

Troubleshooting Common Culinary Challenges

1. Dry Chicken 78

Solution: Marinate the chicken longer, or baste it with oil or marinade while grilling.

2. Excess Oil in Chicken Keema

Solution: After cooking, place the Chicken Keema on paper towels to absorb excess oil.

3. Overcooking Chicken 78 Tikka

Solution: Adjust the grilling time or temperature to avoid overcooking.

4. Burnt Keema Parathas

Solution: Cook the parathas on medium heat and keep flipping them frequently to prevent burning.

Conclusion

In the epic battle of Chicken 78 vs. Chicken Keema, both emerge as winners, offering their unique flavors and textures to captivate culinary enthusiasts. Whether you savor the aromatic delights of Chicken 78 or indulge in the grounded richness of Chicken Keema, these dishes promise an unforgettable gastronomic journey.

So, gather your spices and cooking prowess and embark on a culinary adventure that will leave your taste buds craving for more. Delight your family and guests with the scrumptious creations of Chicken 78 and Chicken Keema, bringing joy and satisfaction to every meal.

VersaBlog: Exploring Health, Fitness, Finance, and More
Mouthwatering Delights: Chilli Chicken vs Chicken 555 – Recipes, Nutritional Value, and Variations

Discover the ultimate battle between Chilli Chicken vs Chicken 555, two mouthwatering chicken recipes that will leave your taste buds tingling. Learn about their recipes, nutritional value, cooking time, variations, FAQs, and more. Get ready for an exciting culinary adventure with these two delightful dishes.

Introduction: A Culinary Clash of Flavors

In this gastronomic article, we embark on an epic taste journey, comparing two delectable chicken dishes: Chilli Chicken and Chicken 555. Both dishes are celebrated for their exquisite taste, unique blend of spices, and succulent textures. We’ll delve into their recipes, nutritional content, cooking times, and explore delightful variations to suit various palates. Prepare to savor the enticing flavors as we unravel the secrets of Chilli Chicken and Chicken 555.

A mouthwatering plate of Chilli Chicken, showcasing succulent golden-brown chicken pieces immersed in a luscious reddish-brown sauce, garnished with vibrant bell peppers, onions, and fiery green chilies,

Chilli Chicken Recipe: An Indo-Chinese Delight

Chilli Chicken is a popular Indo-Chinese dish that has won hearts all over the world with its perfect blend of Asian and Indian flavors. The recipe features bite-sized pieces of succulent chicken, marinated in a tantalizing mix of soy sauce, ginger-garlic paste, and a medley of spices. The marinated chicken is then stir-fried until crispy and tossed with bell peppers, onions, green chilies, and a lip-smacking sauce.

Ingredients:

  • 500g boneless chicken, cut into bite-sized pieces
  • 2 tablespoons soy sauce
  • 1 tablespoon ginger-garlic paste
  • 1 teaspoon red chili powder
  • 1/2 teaspoon black pepper powder
  • 2 tablespoons cornstarch
  • 1/4 cup all-purpose flour
  • Salt to taste
  • 2 tablespoons vegetable oil, for frying
  • 1 large onion, thinly sliced
  • 1 large bell pepper (capsicum), thinly sliced
  • 4-5 green chilies, slit lengthwise
  • 2 tablespoons tomato ketchup
  • 1 tablespoon chili sauce
  • 1 tablespoon vinegar
  • 1 tablespoon soy sauce
  • 1 tablespoon green onion (spring onion), finely chopped, for garnish

Instructions:

  1. In a bowl, marinate the chicken with soy sauce, ginger-garlic paste, red chili powder, black pepper powder, and a pinch of salt. Let it sit for 15-20 minutes to absorb the flavors.
    • “In a separate bowl, combine cornstarch and all-purpose flour.”
    • . Toss the marinated chicken in the flour mixture until evenly coated.
  2. Heat vegetable oil in a wok or frying pan over medium-high heat. Fry the coated chicken pieces until they turn golden brown and crispy.
  3. Remove the cooked chicken from the pan and set it aside.
  4. In the same pan, add a little more oil if needed, and sauté the sliced onions, bell peppers, and green chilies until they become slightly tender.
  5. Add tomato ketchup, chili sauce, vinegar, and soy sauce to the vegetables. Mix and cook for atleast a minute.
  6. Toss in the fried chicken pieces and stir to coat them with the sauce.
  7. Cook for an extra 2-3 minutes, letting the flavors blend together.
  8. Garnish with finely chopped green onions and serve hot with steamed rice or noodles.
A visually appetizing plate of Chilli Chicken, featuring tender, golden-brown chicken pieces immersed in a delectable reddish-brown sauce,

Chicken 555 Recipe: A Fusion of Flavors

Chicken 555 is a culinary gem that originated in the southern region of India. It is known for its aromatic spices and the symphony of flavors that dance on the taste buds. The recipe calls for marinating chicken pieces in a blend of yogurt, turmeric, garam masala, and a special “555 spice mix.” This unique spice mix is a closely guarded secret passed down through generations.

Ingredients:

  • 500g chicken legs or bone-in pieces
  • 1/2 cup yogurt
  • 1 tablespoon ginger-garlic paste
  • 1 teaspoon turmeric powder
  • 2 teaspoons garam masala
  • 1 teaspoon cumin powder
  • 1 teaspoon coriander powder
  • 1 teaspoon red chili powder
  • 1/2 teaspoon black pepper powder
  • Salt to taste
  • 2 tablespoons vegetable oil, for grilling
  • Mint chutney and lemon wedges, for serving

Instructions:

  1. In a large bowl, combine yogurt, ginger-garlic paste, turmeric powder, garam masala, cumin powder, coriander powder, red chili powder, black pepper powder, and salt to create the marinade.
  2. Make deep cuts in the chicken pieces to allow the marinade to penetrate. Coat the chicken with the marinade and refrigerate for at least 2 hours, or preferably overnight for the best results.
  3. Preheat your grill or oven to medium-high heat. Drizzle vegetable oil on the grates to prevent sticking.
  4. Place the marinated chicken on the grill and cook each side for about 15 minutes or until fully cooked and charred. Alternatively, you can bake the chicken in a preheated oven at 200°C (400°F) for 30-35 minutes.
  5. Once cooked, remove the chicken from the grill or oven and let it rest for a few minutes.
  6. Serve hot with mint chutney and lemon wedges for a burst of fresh flavors.
 A captivating platter of Chicken 555, highlighting perfectly grilled chicken legs or bone-in pieces with an enticing charred appearance, complemented by a rich marinade infused with aromatic spices and warm hues

Nutritional Value: A Health Perspective

While both Chilli Chicken and Chicken 555 are undeniably delicious, it’s essential to understand their nutritional content for those conscious about their dietary choices.

Chilli Chicken Nutritional Value

NutrientQuantity per 100g
Calories196 kcal
Protein21.4g
Total Fat11.8g
Saturated Fat2.5g
Carbohydrates2.1g
Fiber0.6g
Sugar0.8g
Sodium589mg
Cholesterol60mg

Chicken 555 Nutritional Value

NutrientQuantity per 100g
Calories168 kcal
Protein22.5g
Total Fat7.8g
Saturated Fat1.8g
Carbohydrates3.4g
Fiber1.2g
Sugar0.4g
Sodium78mg
Cholesterol67mg

Cooking Time: A Race to the Finish Line

When it comes to preparing these delightful dishes, the cooking time can make a significant difference.

Chilli Chicken Cooking Time

Chilli Chicken is relatively quick to prepare, making it an excellent choice for a weeknight dinner or a last-minute gathering with friends. From marination to serving, the entire process takes approximately 40 minutes.

Chicken 555 Cooking Time

On the other hand, Chicken 555 demands a little more patience, as the marination process requires at least 2 hours to infuse the flavors into the chicken properly. The grilling process takes an additional 30 minutes, making the total cooking time approximately 2 hours and 30 minutes.

An irresistible platter of Chicken 555, presenting beautifully grilled chicken legs or bone-in pieces with a tantalizing charred exterior, accented by a rich and aromatic marinade

Variations: A Symphony of Flavors

Variety is the spice of life, and these dishes are no exception. Let’s explore some delightful variations of Chilli Chicken and Chicken 555.

Variations of Chilli Chicken

  1. Dry Chilli Chicken: For those who prefer their Chilli Chicken with less sauce, the dry variation is a perfect choice. Reduce the amount of gravy and toss the stir-fried chicken with spices for an appetizing dry version.
  2. Honey Sesame Chilli Chicken: Add a touch of sweetness to the classic Chilli Chicken by incorporating honey and toasted sesame seeds. The result is a delightful balance of sweet and spicy flavors.
  3. Crispy Chilli Chicken: Achieve an extra crispy texture by batter-coating the chicken before stir-frying it to perfection. The added crunch will elevate the dish to new heights.

Variations of Chicken 555

  1. Butter Chicken 555: Infuse the traditional Chicken 555 with the creamy goodness of butter chicken sauce. The creamy tomato-based gravy perfectly complements the grilled chicken.
  2. Tandoori Chicken 555: Combine the flavors of tandoori spices with Chicken 555 marinade for an explosion of smoky, tangy flavors. Grilled to perfection, this variation is a true culinary delight.
  3. Coconut Milk Chicken 555: Replace the yogurt-based marinade with coconut milk for a luscious, tropical twist to the Chicken 555 recipe. The coconut flavor pairs exceptionally well with the aromatic spices.
 served alongside a refreshing mint chutney and tangy lemon wedges, offering a visual and palatable extravaganza.

FAQs: Answering Your Culinary Queries

  1. Q: Can I use boneless chicken for Chilli Chicken and Chicken 555 recipes?
    • A: Yes, boneless chicken is commonly used for both recipes as it cooks faster and is easier to eat.
  2. Q: Are Chilli Chicken and Chicken 555 spicy dishes?
    • A: Yes, both dishes are known for their spiciness. However, you can adjust the level of heat according to your preference.
  3. Q: Can I substitute chicken with paneer (cottage cheese) for these recipes?
    • A: Absolutely! Paneer can be a fantastic vegetarian alternative for both Chilli Chicken and Chicken 555. Make sure to adjust the cooking time.
  4. Q: Are these dishes gluten-free?
    • A: Chilli Chicken can be made gluten-free by using tamari or gluten-free soy sauce. However, Chicken 555 may contain gluten in its spice mix, so check the ingredients.
  5. Q: Which dish is milder in terms of spiciness?
    • A: Generally, Chicken 555 is milder compared to Chilli Chicken

Conclusion: A Flavorful Showdown

In the ultimate culinary showdown, Chilli Chicken and Chicken 555 both emerge as winners. Their distinct flavors, spices, and cooking techniques offer a delightful experience for food enthusiasts worldwide. Whether you crave the fusion of Indo-Chinese flavors or the aromatic blend of southern spices, both dishes guarantee an explosion of taste in every bite.

So, gather your ingredients and embark on a delicious adventure by trying both Chilli Chicken and Chicken 555 recipes. Whether you’re cooking for family gatherings, dinner parties, or simply satisfying your own cravings, these two chicken dishes will undoubtedly become favorites on your menu.

VersaBlog: Exploring Health, Fitness, Finance, and More
“Aloo Gobi: The Perfect Blend of Potatoes and Cauliflower in a Flavorful Indian Delight”

Introduction
Aloo gobi is a popular Indian dish that combines two key ingredients: potatoes (aloo) and cauliflower (gobi). This flavorful vegetarian dish is a staple in Indian cuisine and is loved for its aromatic spices and mouthwatering taste. In this article, we will delve into the world of aloo gobi, exploring its origins, nutritional information, and providing you with a step-by-step recipe to recreate this delicious dish in your own kitchen.

Table of Contents
The Origins of Aloo Gobi
Aloo Gobi: A Cultural Culinary Journey
The Health Benefits of Aloo Gobi
Aloo Gobi Recipe: Step-by-Step Guide
Tips and Tricks for Making the Perfect Aloo Gobi
Serving Suggestions for Aloo Gobi
Aloo Gobi Variations: Exploring Different Flavors
Frequently Asked Questions (FAQs)Conclusion

  1. The Origins of Aloo Gobi
    Aloo gobi is believed to have originated in the Indian subcontinent, where potatoes and cauliflower are abundantly grown. Its exact origins are difficult to trace, but the dish has been a part of Indian culinary traditions for centuries. The combination of potatoes and cauliflower, along with a unique blend of spices, creates a harmonious and flavorful dish that has stood the test of time.
aloo gobhi
  1. Aloo Gobi: A Cultural Culinary Journey
    Indian cuisine is known for its diverse flavors and regional variations, and aloo gobi is no exception. This dish holds a special place in the culinary traditions of various regions across India. From the streets of Delhi to the coastal kitchens of Goa, aloo gobi has been adapted and reinvented, incorporating local spices and techniques to create unique regional variations.
  2. The Health Benefits of Aloo Gobi
    Aloo gobi not only satisfies your taste buds but also offers several health benefits. Cauliflower is low in calories and high in fiber, making it a great choice for weight management and digestion. Potatoes, on the other hand, provide a good source of energy and essential nutrients like vitamin C and potassium. The combination of these two ingredients creates a balanced and nutritious dish that can be enjoyed guilt-free.
  3. Aloo Gobi Recipe: Step-by-Step Guide
    Making aloo gobi at home is easier than you might think. Follow this step-by-step guide to recreate this flavorful dish:

Ingredients:
2 medium-sized potatoes
1 small cauliflower head
2 tablespoons oil
1 teaspoon cumin seeds
1 teaspoon turmeric powder
1 teaspoon chili powder
1 teaspoon garam masala
Salt to taste
Fresh coriander leaves for garnish

"Aloo Gobi: The Perfect Blend of Potatoes and Cauliflower in a Flavorful Indian Delight"


Instructions:
Peel and chop the potatoes into small cubes. Separate the cauliflower into florets.
Heat the oil in a pan and add the cumin seeds.let them sizzle for a few seconds.
Add the chopped potatoes to the pan and cook for 5 minutes, stirring occasionally.
Add the cauli flower florets and mix well. Cook for another 5 minutes.
Sprinkle turmeric powder, chili powder, and garam masala over the vegetables. Season with salt.
Cover the pan and let the vegetables cook for 15-20 minutes, or until tender.
Stir occasionally to prevent sticking. If needed, add a splash of water to create steam.
Once the vegetables are cooked , garnish with them corriander leaves onto it.
Serve hot with roti or steamed rice.

  1. Tips and Tricks for Making the Perfect Aloo Gobi
    Make sure to cut the potatoes and cauliflower into evenly sized pieces for even cooking.
    If you prefer a spicier version, adjust the amount of chili powder according to your taste.
    To enhance the flavor, you can add a pinch of asafoetida (hing) while tempering the oil.
    For a richer taste, you can add a dollop of ghee (clarified butter) at the end.
    Experiment with different spices and herbs to create your own unique twist on the classic aloo gobi recipe.
  2. Serving Suggestions for Aloo Gobi
    Aloo gobi pairs well with various Indian bread like roti, naan, or paratha. It can also be enjoyed with steamed rice or flavored rice dishes like biryani. To add a refreshing element to your meal, serve a side of cucumber raita or a tangy tamarind chutney. These accompaniments complement the flavors of aloo gobi and elevate your dining experience.
  3. Aloo Gobi Variations: Exploring Different Flavors
    While the classic aloo gobi recipe is delightful on its own, there are numerous variations you can explore to suit your taste preferences. Here are a few popular variations:
"Aloo Gobi: The Perfect Blend of Potatoes and Cauliflower in a Flavorful Indian Delight"

Aloo Gobi Masala: This variation adds a rich tomato-based gravy to the dish, creating a luscious and flavorful curry.
Aloo Gobi Matar: In this version, green peas (matar) are added along with potatoes and cauliflower, adding sweetness and texture to the dish.
Aloo Gobi Tikki: Transform your aloo gobi into crispy and delicious tikkis (patties) by combining the mixture with breadcrumbs and shallow frying.
Aloo Gobi Paratha: Stuff the aloo gobi filling into whole wheat dough to make savory parathas, perfect for breakfast or a light meal.

  1. Frequently Asked Questions (FAQs)
    Q: Is aloo gobi a vegan dish?
    A: Yes, aloo gobi is a vegan dish , as its sources are vegetables only

Q: Can I make aloo gobi ahead of time?
A: Aloo gobi tastes best when served fresh. However, you can prepare the ingredients in advance and cook them just before serving to save time.

Q: Can I freeze leftover aloo gobi?
A: Yes, you can freeze leftover aloo gobi in an airtight container for up to 3 months. Thaw it in the refrigerator before reheating.

Q: Can I substitute other vegetables in aloo gobi?
A: While potatoes and cauliflower are the traditional ingredients, you can experiment with other vegetables like carrots, bell peppers, or green beans to create your own unique version of the dish.

Q: How can I reduce the spice level in aloo gobi?
A: If you prefer a milder version, reduce the amount of chili powder or omit it altogether. You can also add a spoonful of yogurt or coconut milk to balance the heat.

"Aloo Gobi: The Perfect Blend of Potatoes and Cauliflower in a Flavorful Indian Delight"

Q: What makes aloo gobi so popular?
A: Aloo gobi’s popularity stems from its simplicity, versatility, and delicious flavors. It appeals to both vegetarians and non-vegetarians alike, making it a favorite in Indian households and restaurants worldwide.

Conclusion
Aloo gobi is a classic Indian dish that brings together the humble potato and cauliflower in a harmonious blend of spices. Its rich flavors, cultural significance, and health benefits make it a delightful addition to any meal. With the help of this article, you now have the knowledge and recipe to create your own authentic aloo gobi at home. So, gather your ingredients, unleash your culinary skills, and indulge in the aromatic wonders of aloo gobi!

VersaBlog: Exploring Health, Fitness, Finance, and More
Mysore Masala Dosa vs. Mushroom Masala: Exploring Recipes, Comparison, Nutritional Values, Cooking Time, Variations, and FAQs

Discover the ultimate showdown between Mysore Masala Dosa and Mushroom Masala! This comprehensive article explores their recipes, compares their nutritional values, cooking time, variations, and answers frequently asked questions. Get ready to tantalize your taste buds with this mouthwatering comparison! Mysore Masala Dosa vs. Mushroom Masala

Introduction

If you’re a food enthusiast, then you know that every region has its own unique delicacies. In this article, we delve into the delectable world of South Indian cuisine with the classic Mysore Masala Dosa and pit it against the earthy goodness of Mushroom Masala. We will explore their distinctive recipes, nutritional values, cooking time, variations, and address some common FAQs to help you make an informed choice. So, let’s embark on this flavorsome journey!

A series of images depicting the process of making Masala Dosa batter, from soaking the ingredients to blending them into a smooth paste.

Mysore Masala Dosa vs. Mushroom Masala

Here we put Mysore Masala Dosa and Mushroom Masala face to face, examining what sets them apart and what makes them so delightful.

Mysore Masala Dosa

Recipe

The Mysore Masala Dosa is a lip-smacking variation of the traditional dosa. The dosa batter is made from fermented rice and urad dal, which is then spread thin on a hot griddle. The key to its uniqueness lies in the spicy red chutney that is smeared on the dosa’s inner surface before adding a flavorful potato masala filling. The dosa is folded into a cylindrical shape, making it a visual and gastronomic treat.

A plate of Masala Dosa ready to be served.

Nutritional Values

Mysore Masala Dosa is not only a taste sensation but also a healthy choice. It is a rich source of carbohydrates, proteins, and essential vitamins and minerals. The fermented dosa batter enhances digestion and boosts gut health, while the potato masala filling provides a good dose of fiber, potassium, and Vitamin C.

A photo of a Masala Dosa.

Cooking Time

Preparation of Mysore Masala Dosa requires some planning due to the fermentation process involved in making the dosa batter. The overall cooking time may vary depending on the fermentation duration, but it is well worth the wait.

Variations

Although the classic Mysore Masala Dosa is an absolute favorite, there are delightful variations you can try. Some popular options include adding cheese to the potato masala filling or incorporating different vegetables for a twist on the traditional taste.

A photo of a Masala Dosa, recipe

Mushroom Masala

Recipe

Mushroom Masala is a vegetarian delight that brings the earthy flavors of mushrooms together with aromatic spices. The dish typically involves sautéing mushrooms with onions, tomatoes, ginger, garlic, and a blend of spices to create a tantalizing gravy. It pairs exceptionally well with rice or Indian bread like chapati or naan.

Nutritional Values

Mushrooms are a low-caloried food packed with essential nutrients. They are a great source of protein, fiber, vitamins, and minerals such as selenium and potassium. Additionally, the spices used in the masala add a burst of antioxidants and anti-inflammatory properties.

Mushroom Masala being garnished with herbs.

Cooking Time

The preparation of Mushroom Masala is relatively quick and convenient, making it an excellent choice for busy weeknights or when you’re craving a satisfying meal in no time.

Variations

Mushroom Masala offers a canvas for culinary creativity. You can experiment with different spices, herbs, and even add various vegetables to elevate the dish to new heights of flavor.

Nutritional Value Comparison

Let’s dive into the nutritional aspect of both dishes to understand their health benefits better.

Nutritional ComponentsMysore Masala Dosa (Per Serving)Mushroom Masala (Per Serving)
Calories350 kcal180 kcal
Carbohydrates60g8g
Proteins10g5g
Fats7g10g
Fiber6g3g
VitaminsVitamin C, Vitamin AVitamin D, Vitamin B12
MineralsIron, PotassiumSelenium, Phosphorus
A bowl of Mushroom Masala garnished with cilantro.

Cooking Time Comparison

The cooking time for both dishes can influence your choice depending on your schedule and culinary preferences.

Preparation StepsMysore Masala DosaMushroom Masala
Batter Preparation8-12 hours
Cooking Time (approx.)15-20 minutes25-30 minutes
Total Time8-12 hours25-30 minutes

Recipe Variations

Both Mysore Masala Dosa and Mushroom Masala offer room for creativity. Here are some exciting variations to try:

Mysore Masala Dosa Variations

  1. Paneer Masala Dosa: Replace the potato filling with a luscious paneer (cottage cheese) masala for a creamy and rich dosa experience.
  2. Schezwan Masala Dosa: Add a spicy Schezwan twist to the classic dosa with a fiery filling that will leave your taste buds tingling.
  3. Spinach and Cheese Dosa: Incorporate finely chopped spinach and gooey cheese into the dosa for a nutritious and delightful meal.

Mushroom Masala Variations

  1. Coconut Mushroom Masala: Infuse the dish with the goodness of coconut milk, elevating the creamy texture and imparting a tropical touch.
  2. Cashew Mushroom Masala: Add the delightful crunch of cashews to the masala, enhancing both the flavor and texture of the dish.
  3. Mushroom Tikka Masala: Marinate the mushrooms in a spicy tikka masala before cooking, intensifying the dish’s smoky and robust flavors.

FAQs

  1. Q: Are Mysore Masala Dosa and Mushroom Masala suitable for vegans? A: Yes, both Mysore Masala Dosa and Mushroom Masala can be made vegan by using plant-based ingredients and avoiding dairy products.
  2. Q: Are these dishes gluten-free? A: Mysore Masala Dosa can be gluten-free if made with gluten-free ingredients, while Mushroom Masala is typically gluten-free.
enjoying dosxa
  1. Q: Can I freeze the dosa batter or mushroom gravy for later use? A: Yes, you can freeze both dosa batter and mushroom gravy in airtight containers for later use.
  2. Q: Which dish is spicier, Mysore Masala Dosa, or Mushroom Masala? A: Mysore Masala Dosa is generally spicier due to the fiery red chutney used in its preparation.
  3. Q: Can I use canned mushrooms for Mushroom Masala? A: While fresh mushrooms are recommended for the best taste and texture, canned mushrooms can be used as a convenient alternative.
  4. Q: Are Mysore Masala Dosa and Mushroom Masala healthy choices for weight-watchers? A: Yes, both dishes can be part of a balanced diet, provided they are prepared with moderate oil and portion sizes.

Conclusion

In this delightful encounter of Mysore Masala Dosa versus Mushroom Masala, we have explored their distinct recipes, compared their nutritional values, cooking time, and presented exciting variations to satisfy your taste buds. Whether you prefer the tangy spiciness of Mysore Masala Dosa or the earthy richness of Mushroom Masala, both dishes offer unique flavors and health benefits. So, go ahead and indulge in these flavorful South Indian and North Indian delicacies for a culinary experience like no other!

mushroom masalaa
VersaBlog: Exploring Health, Fitness, Finance, and More
The Magic of Aloo Methi: From Roots to Recipes

Introduction:

Aloo Methi, a traditional Indian dish, brings together the earthiness of potatoes and the unique flavor of fenugreek leaves. This aromatic and nutritious combination has been a staple in Indian households for generations. In this article, we will delve into the origins of Aloo Methi, explore its nutritional benefits, provide a variety of mouthwatering recipes, and answer some frequently asked questions about this delectable dish.

1. The Origins of Aloo Methi

Aloo Methi can be traced back to its origins in the Indian subcontinent, where it first gained prominence as a beloved and flavorsome regional delicacy.The combination of potatoes and fenugreek leaves creates a harmonious blend of flavors that has been embraced by various culinary traditions across India. This dish has gained popularity due to its simplicity, taste, and versatility.

2. Nutritional Benefits of Aloo Methi

Aloo Methi not only satisfies the taste buds but also provides several health benefits. The fenugreek leaves in Aloo Methi are rich in essential nutrients, including vitamins A, C, and K, as well as minerals like iron, calcium, and potassium. Fenugreek leaves are also known for their potential to aid digestion, regulate blood sugar levels, and support heart health. Combined with the goodness of potatoes, Aloo Methi offers a nutritious addition to your diet.

 Fresh Fenugreek Leaves

3. Aloo Methi Recipes

Recipe 1: Classic Aloo Methi Curry

Ingredients:

  • 2 medium-sized potatoes, peeled and cubed
  • Take a bunch of fresh fenugreek leaves, ensuring they are thoroughly washed and finely chopped.
  • 2 tablespoons oil
  • 1 teaspoon cumin seeds
  • 1 teaspoon ginger-garlic paste
  • 1 onion, finely chopped
  • 2 tomatoes, pureed
  • 1 teaspoon turmeric powder
  • 1 teaspoon red chili powder
  • Salt to taste

Instructions:

  1. Heat oil in a pan and add cumin seeds, allowing them to sizzle and release their aroma.
  2. Next, add ginger-garlic paste and sauté for a minute until fragrant.
  3. Toss in the onions and cook until they turn a golden brown hue.
  4. Now, it’s time to introduce the tomato puree, turmeric powder, red chili powder, and salt. Stir and cook until the oil begins to separate from the masala, creating a flavorful base for your dish.
  5. Add the cubed potatoes and fenugreek leaves. Mix well.
  6. Cover the pan and let the curry simmer for 15-20 minutes or until the potatoes are cooked through.
  7. Serve hot with roti or rice.

Recipe 2: Aloo Methi Paratha (Potato and Fenugreek Stuffed Flatbread)

Aloo Methi Paratha

Ingredients:

  • 2 cups whole wheat flour
  • 2 medium-sized potatoes, boiled and mashed
  • Take a bunch of fresh fenugreek leaves, ensuring they are thoroughly washed and finely chopped.
  • 1 teaspoon carom seeds
  • 1 teaspoon red chili powder
  • 1/2 teaspoon turmeric powder
  • Salt to taste
  • Ghee (clarified butter) for cooking

Instructions:

  1. In a large bowl, combine the whole wheat flour, mashed potatoes, fenugreek leaves, carom seeds, red chili powder, turmeric powder, and salt.
  2. Mix the ingredients well to form a smooth dough, ensuring all the elements are properly incorporated.
  3. Divide the dough into small portions and roll each portion into a small circle using a rolling pin.
  4. Heat a tawa or griddle over medium heat and cook the paratha on both sides, applying a generous amount of ghee to enhance its flavor and achieve a golden brown crust.
  5. Serve hot with yogurt or pickle.

4. FAQs about Aloo Methi

Q: What is the best time to enjoy Aloo Methi?

A: Aloo Methi can be enjoyed as a comforting lunch or dinner option. It pairs well with both roti and rice.

Q: Can I use dried fenugreek leaves instead of fresh ones?

A: While fresh fenugreek leaves are preferred for their distinct flavor, you can use dried fenugreek leaves (kasuri methi) as a substitute. However, remember to adjust the quantity accordingly as dried fenugreek leaves have a more concentrated flavor.

Q: Is Aloo Methi suitable for a vegan diet?

A: Yes, Aloo Methi can be easily prepared in a vegan-friendly manner by using oil instead of ghee and avoiding any dairy-based accompaniments.

Q: Can I freeze Aloo Methi for later use?

A: Yes, you can freeze Aloo Methi curry or parathas for later use. Ensure proper packaging to maintain the flavor and texture.

 Cooking Aloo Methi on a Griddle

Q: Can I add other vegetables to Aloo Methi?

A: Absolutely! Aloo Methi is a versatile dish, and you can experiment by adding vegetables like peas, carrots, or cauliflower to enhance the flavor and nutritional value.

Q: Are there any regional variations of Aloo Methi?

A: Yes, different regions in India have their own variations of Aloo Methi. Some may add spices like fenugreek seeds or mustard seeds, while others may incorporate yogurt or cream for a richer taste.

5. Conclusion

Aloo Methi is a delightful combination of flavors that brings warmth and nutrition to your plate. Whether you prefer the classic curry or the stuffed parathas, this versatile dish offers a delicious way to incorporate fenugreek leaves and potatoes into your meals. With its rich history, nutritional benefits, and countless variations, Aloo Methi has earned its place as a beloved and enduring favorite in Indian cuisine.

Aloo Methi Curry Served Aloo Methi Dish with Garnish
VersaBlog: Exploring Health, Fitness, Finance, and More
Tandoori Fish Recipe: A Delicious and Healthy Option with Low Calories

Introduction
Are you looking for a mouthwatering seafood recipe that is both delicious and healthy? Look no further! In this article, we’ll explore the tantalizing world of Tandoori Fish. Not only does this recipe boast incredible flavors, but it also offers a low-calorie option for those watching their waistlines.

tandoori fish images

Be ready to taste the delicious dish of tandoori fish

Table of Contents
What is Tandoori Fish?
Ingredients Required
Marinating the Fish
Preparing the Tandoor or Oven
Cooking Instructions
Serving Suggestions
Health Benefits of Tandoori Fish
Variations of Tandoori Fish
Frequently Asked Questions (FAQs)
Conclusion
Get Access Now

  1. What is Tandoori Fish?
    Tandoori Fish is a popular Indian dish that originated in the region of Punjab. It is prepared by marinating fresh fish in a mixture of yogurt and spices, giving it a distinct flavor. Traditionally, the fish is cooked in a tandoor, a clay oven, but it can also be prepared in a regular oven or grilled to perfection.
  2. Ingredients Required
    To prepare Tandoori Fish, you will need the following ingredients:

Fresh fish fillet
Yogurt
Ginger-garlic paste
Lemon juice
Tandoori masala (a blend of spices)
Red chili powder
Turmeric powder
Cumin powder
Coriander powder
Salt
Vegetable oil
Fresh coriander leaves (cilantro) for garnish

tandoori fish dish
  1. Marinating the Fish
    To infuse the fish with flavor, it needs to be marinated. Follow these steps:

Clean the fish fillets and make the cuts onto the both sides
In a bowl, combine yogurt, ginger-garlic paste, lemon juice, tandoori masala, red chili powder, turmeric powder, cumin powder, coriander powder, and salt. Mix well and form the paste out of it.
Coat the fish fillets and ensure that they are well-covered. Allow them to marinate for at least 30 minutes to an hour in the refrigerator. The longer the marination time it will take, the more desired flavors will be.

  1. Preparing the Tandoor or Oven
    If you have access to a tandoor, preheat it to a high temperature. If you’re using an oven, preheat it to 400°F (200°C). Grease a baking tray or line it with aluminum foil to prevent sticking.
  2. Cooking Instructions
    Follow these steps to cook your Tandoori Fish:

Place the marinated fish fillets on the greased baking tray or foil-lined tray.
Brush some vegetable oil on top of the fish to prevent drying.
Bake the fish in the preheated oven for approximately 15-20 minutes or until it is cooked through and has a slightly charred appearance.
If using a tandoor, carefully place the fish on skewers and cook until done.

recipe of tandoori fish
  1. Serving Suggestions
    Once your Tandoori Fish is ready, serve it hot with a sprinkle of fresh coriander leaves. You can also squeeze some lemon juice over the fish for an extra tangy kick. Tandoori Fish pairs well with mint chutney, cucumber raita, or a side of steamed basmati rice. Enjoy this delectable dish with family and friends.
  2. Health Benefits of Tandoori Fish
    Tandoori Fish offers several health benefits, making it a nutritious choice for seafood lovers. Some of the benefits include:

High-quality protein: Fish is an excellent source of lean protein, essential for muscle growth and repair.
Omega-3 fatty acids: Fish, particularly oily fish like salmon, is rich in omega-3 fatty acids, which are beneficial for heart health and brain function.
Low in calories: Tandoori Fish is a low-calorie dish, making it suitable for those aiming to maintain a healthy weight.
Vitamins and minerals: Fish is packed with essential vitamins and minerals, including vitamin D, vitamin B12, and iodine.

  1. Variations of Tandoori Fish
    While the classic Tandoori Fish recipe is delightful on its own, you can experiment with different variations to suit your taste. Here are a few ideas:

Tandoori Fish Tikka: Cut the fish into bite-sized pieces and marinate them before grilling or baking.
Tandoori Fish Wraps: Fill warm tortillas with Tandoori Fish, fresh salad, and a drizzle of mint yogurt sauce for a quick and satisfying meal.
Tandoori Fish Curry: Add the Tandoori Fish to a flavorful curry sauce for a unique twist on traditional fish curry.
Frequently Asked Questions (FAQs)
Can I use frozen fish for Tandoori Fish?

Yes, you can use frozen fish. Ensure it is thoroughly defrosted before marinating.
How long should I marinate the fish?

Minimum of 30 minutes to an hour and the longer marination time enhances the flavors o the dish

calories of tandoori fish


Can I grill Tandoori Fish?

Absolutely! Grilling adds a smoky flavor to the fish. Ensure the grill is well-oiled to prevent sticking.
Can I substitute yogurt with a dairy-free alternative?

Yes, you can use dairy-free yogurt or coconut milk yogurt as a substitute.
How can I make the dish spicier?

To make it more spicy add the amount of red chili powder or add chopped green chilies to the marinade.

mouthwatering


Conclusion
In conclusion, Tandoori Fish is a delectable seafood dish that combines enticing flavors with health benefits. Whether you choose to cook it in a tandoor or an oven, the result will be a flavorful and satisfying meal. Enjoy the succulent fish with its aromatic spices, and savor the goodness it brings to your palate and well-being.